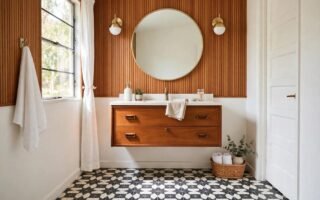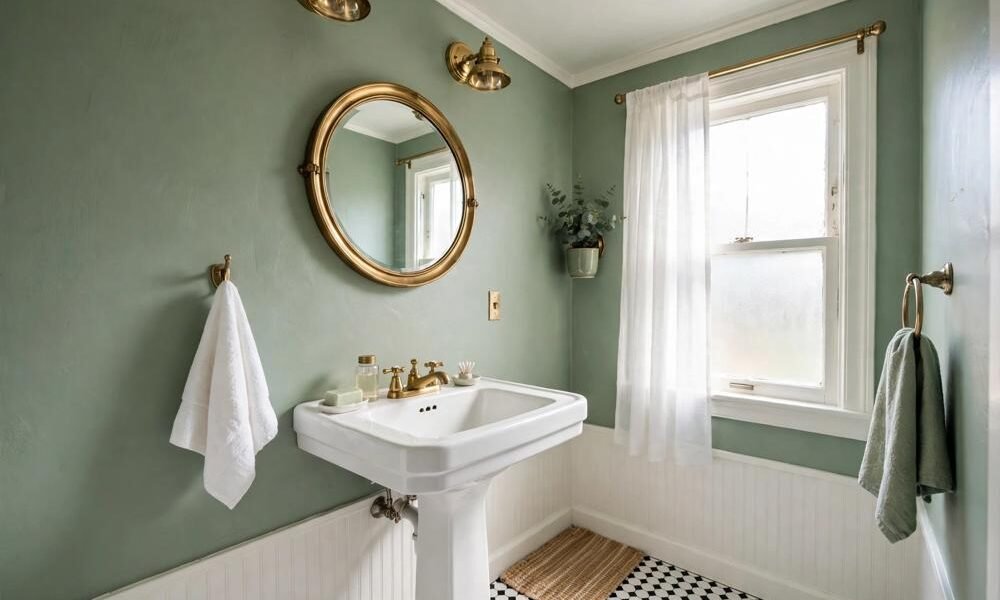
Yes, you can get a retro bathroom look in a small space without a full renovation. Start with paint, accessories and lighting, keep one strong vintage feature, and leave everything else simple, because a small bathroom looks crowded fast when every surface is trying to be a statement.
Key Takeaways
- Pick one retro hero, such as the tile, the mirror, the vanity or the lighting, and keep the rest calm.
- Paint, hardware, a shower curtain and accessories give the fastest retro change for the lowest cost.
- Tile and fixtures are the most expensive changes, so decide those after you have lived with the cheaper layers.
- Renters can get most of this look with peel-and-stick tile, removable wallpaper, swapped hardware and clip-on lighting.
- Measure first in a small bathroom: a beautiful vintage piece that blocks a door or crowds a toilet is not a good buy.
1. Start With Paint, Not Demolition
Paint is the cheapest way to change the era of a bathroom. A deep green, a soft pink, a warm cream or a muted aqua can make plain white fixtures read as vintage, especially when the hardware and mirror match the same period feeling.
In a small bathroom, keep the darkest colour on one wall or below a picture rail line, and keep the rest light. That gives you the mood without making the room feel smaller. Gloss or semi-gloss paint is easier to wipe down in a bathroom, which matters more than a perfectly flat vintage finish.
2. Let One Vintage Feature Lead
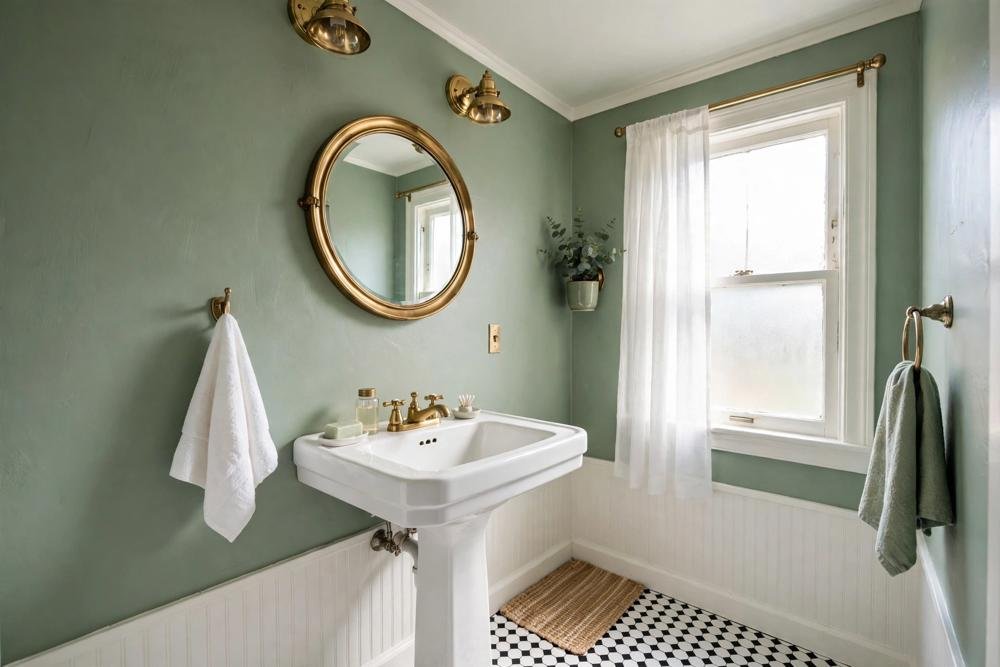
Retro bathrooms work best when one thing leads. That could be a checkerboard floor, a clawfoot-style tub, a pedestal sink, a globe light or a patterned tile wall. When that one feature is clear, the rest of the room can be plain and the look still reads as intentional.
If you try to add all of them at once in a small room, the result is usually busy rather than charming. Choose the feature you love most, and let the other choices support it. A plain white subway tile wall, for example, lets a bold floor or a brass mirror do the talking.
3. Use Accessories for Instant Era
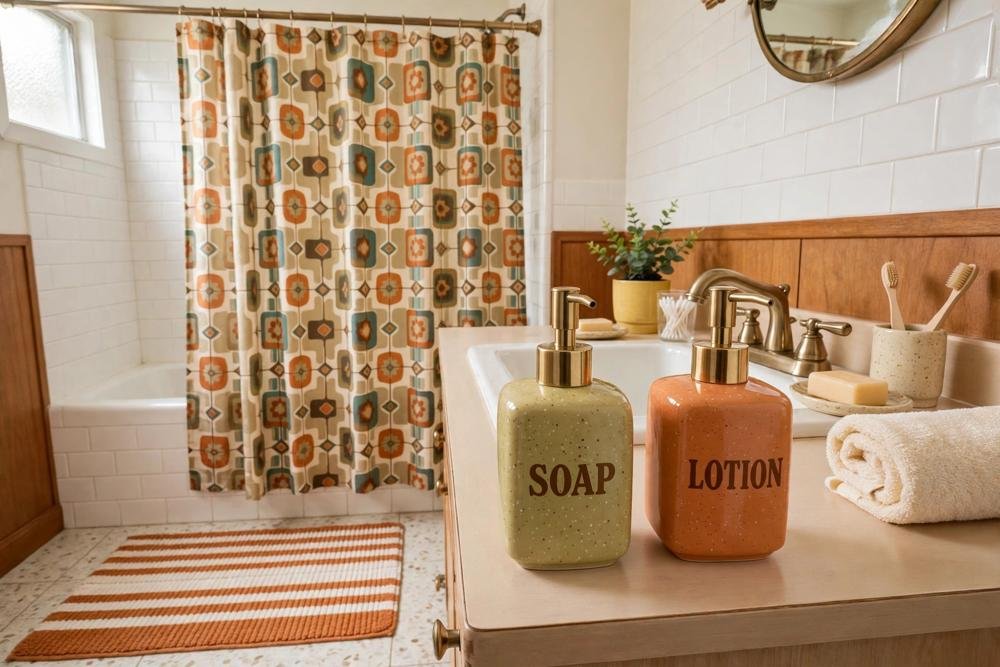
Accessories are where a retro bathroom comes alive quickly. A patterned shower curtain, a striped or floral bath mat, glass soap dispensers, a ceramic toothbrush holder and a framed vintage-style print can change the whole feeling in an afternoon.
This is also the safest place to experiment. If a colour or pattern does not work, you can swap a curtain or a mat far more cheaply than you can swap tile. Keep accessories in two or three colours that already appear in the room, so the collection looks planned rather than random.
4. Choose Tile That Fits the Decade You Love
Tile is the feature most people picture when they think of a retro bathroom, and for good reason. Hexagon floor tile, penny tile, checkerboard floors and subway wall tile each point to a different era, and each one works in a small space if the scale is right.
Small tiles, such as hex or penny tile, suit small floors because they do not need large cuts and they grip well underfoot. Larger checkerboard tiles can also work, but they need careful layout so the pattern does not end awkwardly at the door. Peel-and-stick tile is a useful renter option for floors and some wall areas, but be honest about its limits in wet zones: it suits low-splash areas better than the inside of a shower, and it will not last as long as real tile.
5. Add Brass, Nickel or Black Hardware Thoughtfully
Hardware is a small change with a big visual return. Brass reads warm and 1920s or mid-century, nickel reads clean and classic, and matte black reads bolder and more modern-retro. The trick is to match the finish across the main pieces: tap, towel rail, toilet paper holder and cabinet pulls.
You do not need to replace plumbing to change this look. Many taps and handles can be swapped, and cabinet pulls are a simple screwdriver job. Keep the old hardware in a bag, especially in a rental, so you can put it back when you move out.
6. Get the Mirror Right
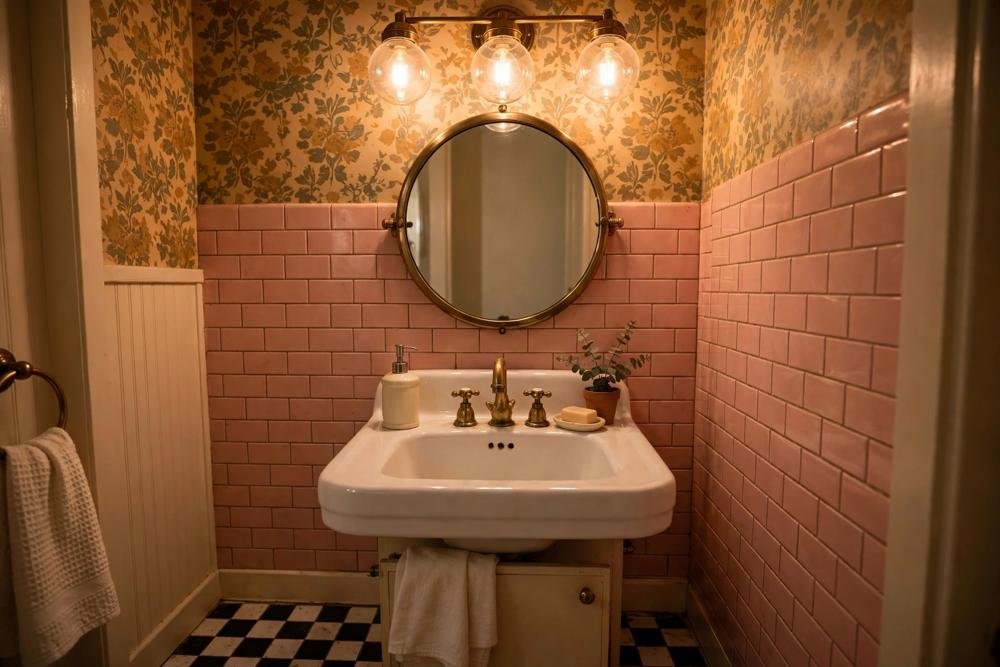
A mirror can set the whole era. A round mirror with a brass frame, an arched mirror, or a simple rectangular mirror with a wooden frame each gives a different vintage feeling. In a small bathroom, one well-sized mirror is better than several small ones, because it bounces light and makes the room feel larger.
Hang the mirror so its centre is roughly at eye level for the people who use it most, and leave a little space between the mirror and the light so the light does not glare straight into your eyes. If you are renting, adhesive or leaning mirrors can work, but check the weight limit and the wall surface first.
7. Layer the Lighting
Retro bathroom lighting is usually warm, layered and a little decorative. Globe vanity lights are the classic choice, and they suit many retro styles from 1920s to mid-century. The key is to have light at face level, not only a single ceiling light that casts shadows.
In a small bathroom, two small globe lights beside the mirror often work better than one oversized fixture. Add a dimmer if you can, because bright light is useful for getting ready and softer light is better for a bath. For a no-window bathroom, layered light matters even more, since there is no daylight to soften the room.
8. Work With the Fixtures You Already Have
You do not need a clawfoot tub to have a retro bathroom. A standard white tub or shower can look vintage with the right curtain, tile and accessories around it. A pedestal sink is a lovely retro feature, but it gives up storage, so in a very small bathroom a vanity with closed storage may be the more practical choice.
If you do replace a fixture, check the plumbing and the floor first. Older homes can have pipe sizes and drain positions that make a swap more expensive than expected, and that is a job for a professional, not a weekend guess. Keep the existing fixture if it works well and spend the money on the visible layers instead.
9. Add Pattern in Small, Washable Doses
Pattern is essential to retro style, but a small bathroom needs restraint. A patterned shower curtain, a patterned floor, or one patterned wall is usually enough. Two bold patterns in a tiny room often fight each other.
Choose patterns that can handle moisture. Wallpaper in a bathroom should be moisture-safe and kept away from direct splashes, and fabric shower curtains should be washable. A patterned bath mat is an easy test: if you love the pattern every morning, you can commit to more of it later.
10. Make Storage Look Like Decor
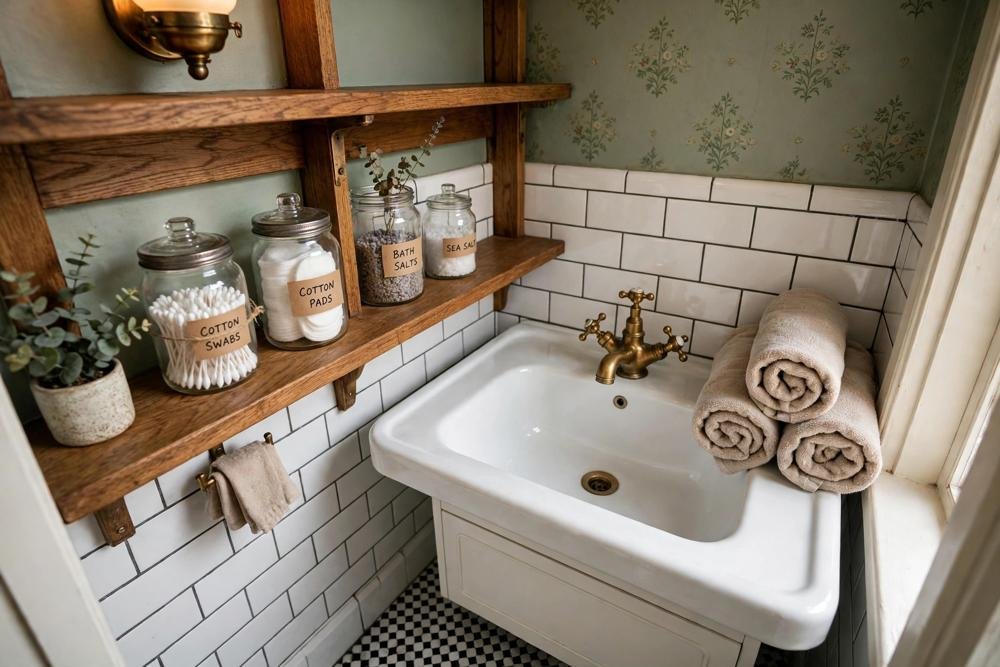
Retro bathrooms often had open shelves, glass jars and baskets rather than hidden built-in storage. That look can work in a small bathroom if it is kept tidy. A small wooden shelf, a couple of glass jars for cotton pads, and a basket for rolled towels look intentional and vintage.
The risk is clutter. Limit open storage to things you actually use every day, and keep the rest behind a closed door or in a basket with a lid. A tidy shelf reads as retro; a crowded shelf just reads as messy.
11. Pick Colours by Decade, Then Edit
Each decade has its own bathroom palette. The 1920s leaned black and white with nickel. The 1950s loved pink, mint and aqua. The 1970s brought avocado, warm browns and orange. Choosing one decade as your starting point makes every later choice easier.
You do not have to copy a decade exactly. Take the colours you like, drop the ones you do not, and keep the total palette to three or four colours. That edited version usually looks more liveable than a strict period copy, and it is easier to update later.
12. Keep It Renter Friendly Where It Matters
Renters can get most of a retro bathroom without changing anything permanent. Peel-and-stick tile, removable wallpaper, a new shower curtain, swapped cabinet pulls, a freestanding shelf and a new mirror cover a lot of ground. Always check your lease and ask your landlord before drilling, painting or changing a fixture, and keep the originals so you can restore the room.
A simple landlord checklist helps: what you plan to change, whether it is reversible, and how you will restore it. Most landlords are more open to reversible changes than to permanent ones, and a clear plan makes a yes more likely.
13. Mind the Small Room Rules
Small bathrooms punish big gestures. A very large mirror frame, a very wide vanity or a very bold floor pattern can overwhelm the room. Measure the door swing, the toilet clearance and the space in front of the sink before you buy anything large.
Leave clear floor in front of the toilet and the sink, and keep the path to the door open. A retro bathroom should feel charming, not cramped, and that feeling comes from clear space as much as from style.
14. Mix Old and New on Purpose
A fully vintage bathroom can feel like a museum, and a fully modern bathroom with one vintage print can feel unfinished. The sweet spot is usually one or two true vintage pieces, such as a mirror or a stool, mixed with clean modern basics that are easy to clean and maintain.
This mix also helps with budget. Spend on the pieces you touch and see every day, such as the mirror, the tap and the lighting, and save on the pieces that are mostly background, such as plain wall tile and simple storage.
15. Plan the Order So You Do Not Redo Work
Do the messy work first, then the clean work. That means plumbing and tile before paint, paint before hardware, and accessories last. It sounds obvious, but many small bathroom projects get redone because a new tile job damaged fresh paint or a new light was fitted before the wall was finished.
If you are doing the project in stages, start with the layer that changes the room most for the least money, usually paint and accessories, and save tile and fixtures for a later stage when you know you love the direction.
Retro Bathroom Ideas by Cost and Difficulty
| Idea | Approximate cost | Difficulty | Best for |
|---|---|---|---|
| Paint one or two walls | Low, roughly $30 to $120 for paint and supplies | Easy, a weekend | Renters with permission, quick refresh |
| Accessories, curtain and mat | Low, roughly $30 to $150 total | Easy, an afternoon | Every small bathroom |
| Hardware and cabinet pulls | Low to medium, roughly $40 to $200 | Easy to medium | Renters, if originals are kept |
| Mirror and lighting swap | Medium, roughly $80 to $400 | Medium, check wiring | Bathrooms with dull light |
| Peel-and-stick tile | Medium, roughly $100 to $400 | Medium, needs careful prep | Renters, low-splash areas |
| Real tile floor or wall | Higher, roughly $500 and up, varies widely | Hard, often professional | Long-term homes |
| Fixture replacement | Higher, varies widely by fixture and plumbing | Hard, professional advised | Homes planning a full update |
Prices are estimates only and vary by location, size and product choice. Always check current prices before you buy, and get a quote for plumbing or electrical work rather than guessing.
What to Avoid
- Do not mix three bold patterns in a tiny room. Pick one strong pattern and keep the rest calm.
- Do not buy a vintage fixture without measuring the door, the toilet clearance and the drain position.
- Do not use peel-and-stick tile inside a shower as if it were real tile. It is better in low-splash areas.
- Do not present AI-generated illustration images as photos of a real renovation. Use them as ideas, not as proof of a finished project.
- Do not ignore moisture. Wallpaper, fabric and wood need moisture-safe choices in a bathroom, or they will not last.
- Do not start with the most expensive change. Live with paint and accessories first, then commit to tile or fixtures.
Conclusion
A retro bathroom in a small space works when you choose one hero feature, keep the palette edited, and build the look in layers from paint and accessories up to tile and fixtures. You do not need a full renovation to get the feeling, and renters can get most of it with reversible changes. Start with the cheapest layer, live with it for a few weeks, and then decide whether the bigger changes are still worth it.
FAQs
Can I get a retro bathroom look without renovating?
Yes. Paint, a shower curtain, accessories, hardware and a mirror can change the era of a bathroom without touching tile or plumbing. Start there, and only move to tile or fixtures if you still want more after living with the cheaper layers.
What is the cheapest retro bathroom idea for a small space?
Accessories are usually cheapest. A patterned shower curtain, a bath mat, glass dispensers and a framed print can cost under $150 in total and change the room in an afternoon. Paint is the next cheapest step if your landlord allows it.
Is peel-and-stick tile good for a retro bathroom?
It can work well on floors and low-splash walls, and it is a good renter option. It is less suited to the inside of a shower, where constant water will shorten its life. Prepare the surface well, and treat it as a medium-term solution rather than a permanent tile job.
How do I make a small retro bathroom not feel crowded?
Pick one hero feature, keep the palette to three or four colours, and leave clear floor in front of the toilet and sink. One bold pattern is usually enough in a tiny room, and a well-sized mirror helps the room feel larger.
Which retro style suits a small bathroom best?
The 1920s black-and-white look and the 1950s pastel look both suit small bathrooms well, because they use light colours and simple shapes. Moody dark colours can also work, but they need good layered lighting, especially in a bathroom with no window.
Should I mix vintage and modern in a retro bathroom?
Yes, in most cases. One or two true vintage pieces mixed with clean modern basics usually looks more liveable and is easier to clean than a strict period copy. Spend on the pieces you see and touch every day, and keep the background simple.