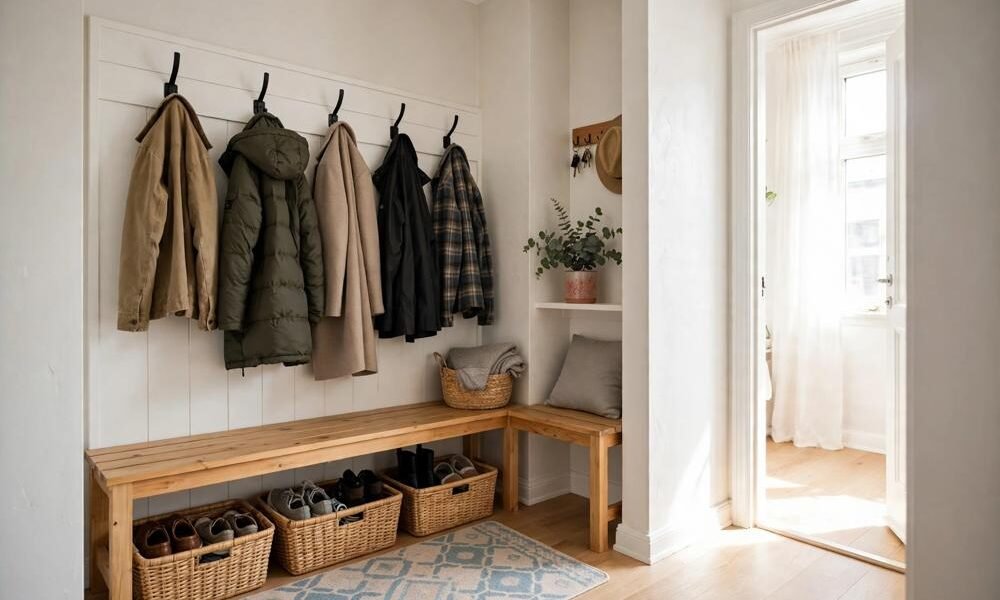
A mini mudroom is not a separate room. It is one corner by the door, set up so coats, shoes, bags, keys, and wet gear each have a home, without building anything large. In an apartment or a small home, that corner system, a row of hooks, a bench or a small seat, shoe storage, a basket, a boot tray, and a washable mat, can do most of the work of a full mudroom, and it can be done with no drilling, with light drilling, or as a more built in corner unit.
Key takeaways
- A mini mudroom is a corner system, not a renovation: hooks, a seat, shoe storage, a basket, a boot tray, and a mat.
- Measure both walls, the door swing, and the clear walkway before you buy anything.
- No-drill is the safest starting point for renters, and it can be upgraded later.
- Light drilling gives you a sturdier hook rail and shelf, with landlord permission first.
- A built-in corner unit gives the most closed storage, but it needs anchoring and a larger budget.
- Keep daily items only in the corner, and move out of season gear elsewhere.
- Keep the exit route and door swing clear, and anchor any tall unit to the wall.
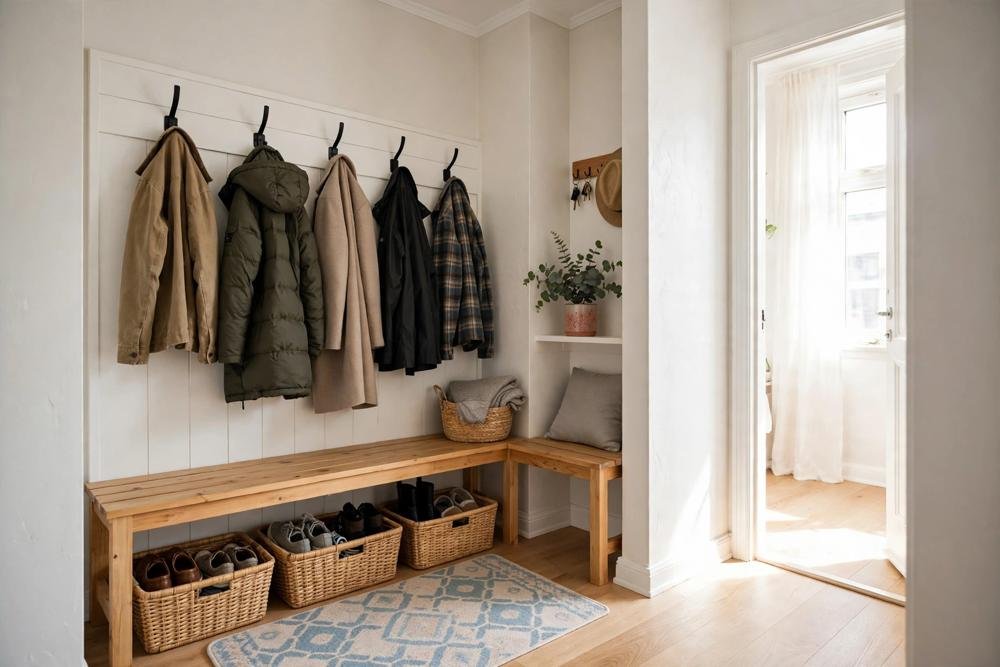
What a Mini Mudroom Actually Is
A traditional mudroom is a room between the outside door and the rest of the house, with a bench, hooks, cubbies, and a place for muddy boots. Most apartments and small homes do not have that room, and many do not even have a hallway. The door opens straight into a living room, or into a short passage that is already busy.
A mini mudroom copies the jobs of that room, in a much smaller footprint. It needs five jobs, and only five. Hang coats and bags. Sit down to change shoes. Store daily shoes where they can be found. Catch wet boots and umbrellas. Hold the small things that get lost, such as keys, sunglasses, and a dog lead. If your corner does those five jobs, it is a mudroom, even if it is only a metre of wall.
What it does not need is a full wardrobe, a row of cubbies for every family member, or storage for everything you own. That is where most small entryways go wrong. People try to fit a full mudroom into a corner, the corner fills up, the walkway narrows, and the system is abandoned within a month. A mini mudroom works because it is deliberately small. It holds what you use today and this week, and nothing else.
Start by listing the daily load, honestly. Count the coats worn this week, not the coats owned. Count the pairs of shoes worn daily, not the shoes in the wardrobe. Add one bag per person who uses the door daily, keys, and, if relevant, a dog lead, a school bag, or a work bag. That list decides the size of your system. One person in a studio needs hooks, one basket, and a tray. A family of four needs a bench, more hooks at two heights, and a shoe rack with room for at least one pair per person, plus a boot tray in winter.
Measure the Corner First
Before you choose a version, measure the corner the same way the pillar guide describes. Measure both walls from the corner outwards, and write both numbers down. Measure the height at several points, and note skirting boards, door trim, light switches, radiators, and plug sockets. A bench that is perfect on paper can fail at home because a skirting board pushes it 2 cm away from the wall, or because a door frame sits closer than expected.
Next, mark the door swing. Open the front door fully and note the arc it sweeps across the floor. Nothing fixed should sit inside that arc, and nothing should force you to squeeze past a half open door. Then check the clear walkway. As a general comfort guide, not a building code, aim to leave approximately 75 to 90 cm of clear walking width where people pass every day. If a bench or a shoe rack would cut that width below a comfortable pass, that piece is too deep for your corner.
It also helps to draw a simple footprint on paper, even a rough sketch. Draw the corner as an L shape, mark the door swing as a curved arc, shade the walkway you must keep clear, and then draw the bench, hooks, and tray inside the remaining space. This is the diagram the brief asks for, described in words here: corner footprint, door swing arc, and clearance. You do not need drawing skill. You need to see, before you spend money, whether a bench will fit without blocking the door, and whether a tall unit will leave room to turn around.
Finally, think about the floor. A mini mudroom lives or dies by its floor protection. Wet shoes, mud, and umbrella drips will damage a wooden floor and stain a rug if there is no tray and no washable mat. Put the boot tray and the mat in your plan from the start, not as an afterthought, and choose a mat that lies flat, does not curl at the edges, and can go in the wash.
Three Versions Compared
There are three sensible ways to build a mini mudroom in a corner. They differ in cost, in how permanent they are, and in how much permission they need. The table below gives approximate ranges only. Prices vary by product, by shop, and by country, and you should check the listing before you buy. Times are for one person working at a normal pace, not including shopping or delivery.
Comparison table:
| Version | Approximate cost | Time | Renter friendly | Best for |
|---|---|---|---|---|
| No-drill version | under $50 to $100 in total for hooks, a freestanding bench or stool, baskets, a tray, and a mat | approximately 1 to 2 hours | yes, nothing drilled | renters, short leases, and anyone who wants to test the layout first |
| Light drilling version | $100 to $250 in total for a fixed hook rail, a wall shelf, a bench, a shoe rack, baskets, a tray, and a mat | approximately half a day | only with landlord permission before drilling | longer stays and households that need sturdier hooks for heavy coats and bags |
| Built-in version | $250 to $600 or more in total for a corner hall tree, a corner cabinet, or a fitted bench with closed storage, plus baskets, a tray, and a mat | approximately a full day, or a weekend if you are fitting and anchoring a tall unit | usually no, unless the unit is freestanding and the landlord agrees | owners and for corners that need closed storage for out of season items |
Do not choose the built-in version just because it looks the tidiest in a photograph. Choose the version that fits your lease, your budget, and your wall. A no-drill system that you actually use is better than a built-in unit that you cannot anchor safely, or that you have to remove when you move out.
Version 1: No-Drill Mini Mudroom
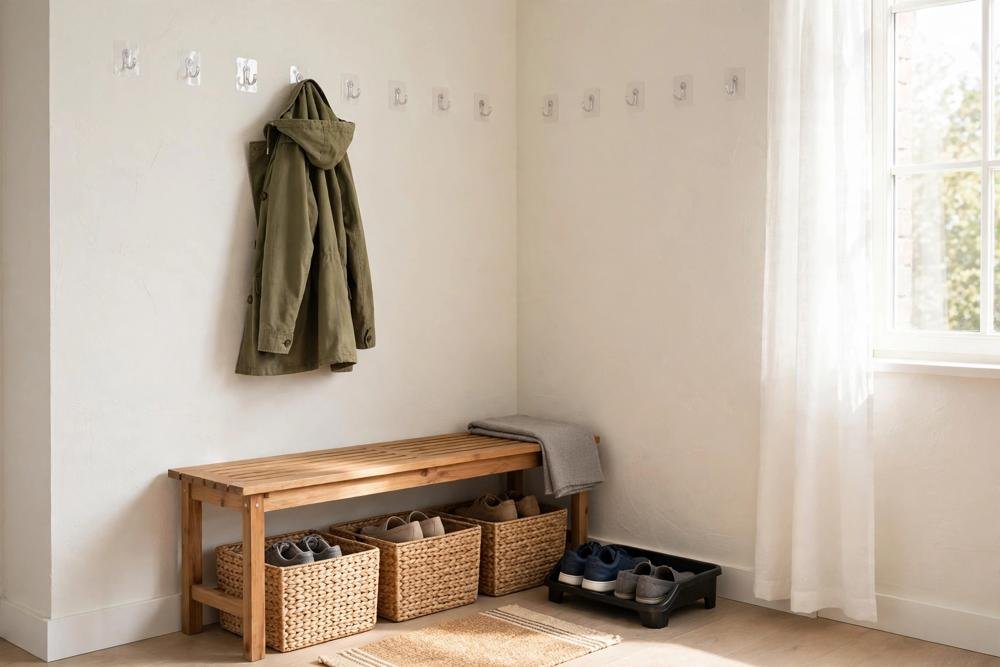
The no-drill version is the best place to start, especially if you rent, if you have just moved in, or if you are not sure which corner layout will work. It uses only freestanding and adhesive pieces, so you can move it, adjust it, and take it with you.
Start with adhesive hooks. Choose hooks rated for the weight you will actually hang on them, and check the weight limit on the packaging before you buy. A heavy winter coat plus a bag can be several kilograms, and a hook rated for a light scarf will fail. Test one hook first, following the instructions for cleaning the wall and waiting the recommended time before loading it. Put the most used coats at the easiest height, approximately 165 to 175 cm from the floor for most adults, and add one lower hook for children if needed. Keep one hook free for a guest coat or a bag, so the system does not overflow on the first visit.
Next, add a freestanding bench, a small stool, or a low storage bench. A bench depth of approximately 35 to 45 cm is a typical range, but check the product listing and, more importantly, check that the walkway stays comfortable once the bench is in place. Under the bench, use one or two open baskets or a low shoe rack. Baskets hide the mess, they pull out easily, and they stop shoes from spreading across the floor. On the floor beside the bench, put a boot tray for wet shoes and a washable mat in front of the bench. A small tray for keys, on top of the bench or on a small wall shelf that stands on the bench, finishes the system.
The weakness of the no-drill version is weight and height. Adhesive hooks cannot safely hold a tall unit, and they should not be used to anchor anything. Do not hang a heavy hall tree from adhesive hooks, and do not use adhesive hooks as a substitute for anchoring a tall shelf. If you need a tall unit, you need the next version, or a freestanding unit that stands on its own and does not need to be fixed to the wall. For a first mini mudroom, though, no-drill is honest, cheap, and easy to change. Live with it for a few weeks, note what works and what does not, and then decide whether you need to drill at all.
Version 2: Light Drilling Mini Mudroom
Light drilling means a small number of well placed fixings, not a rebuild. Typically that is a fixed hook rail, one wall shelf above it, and possibly a fixed shoe rack or a wall mounted basket. The bench itself can still be freestanding, which keeps the system flexible.
Get landlord permission before drilling, if you rent, and keep a note of that permission. Choose fixings suited to your wall type, because a fixing that works in brick may not work in plasterboard. A hook rail fixed into studs, or into rated wall anchors, will hold heavy winter coats and bags far more reliably than adhesive hooks, and it will not peel paint when it is removed, provided you fill and touch up the holes properly when you leave.
A typical light drilling layout looks like this. A hook rail at approximately 165 to 175 cm, with hooks spaced far enough apart that coats do not bunch together. A shallow shelf above the rail, approximately 15 to 20 cm deep, for keys, sunglasses, and a small plant, kept shallow so it does not become a pile of clutter. A freestanding bench below, with baskets or a shoe rack underneath. A boot tray and a washable mat on the floor. That is the whole system, and it is enough for most households.
The advantage over no-drill is sturdiness and height. You can hang a heavier coat, a work bag, and a school bag without worrying about a hook falling in the night. You can also add a higher shelf for out of season hats and gloves, as long as you can reach it safely. The disadvantage is permanence. You are making holes, even small ones, and you will need to fill them when you move. That is a fair trade for a longer stay, but it is not worth it for a three month lease, or for a corner you have not yet tested with a no-drill setup.
If you drill, do one more safety check. Do not drill near a light switch, a plug socket, or a radiator pipe without checking what is behind the wall, and follow the instructions that come with your fixings. Keep the exit route and the door swing clear, just as in the no-drill version, and do not let a fixed shelf or rail narrow the walkway. Fixed does not mean it cannot be moved later, but it does mean you should measure twice before you drill once.
Version 3: Built-In Corner Mudroom
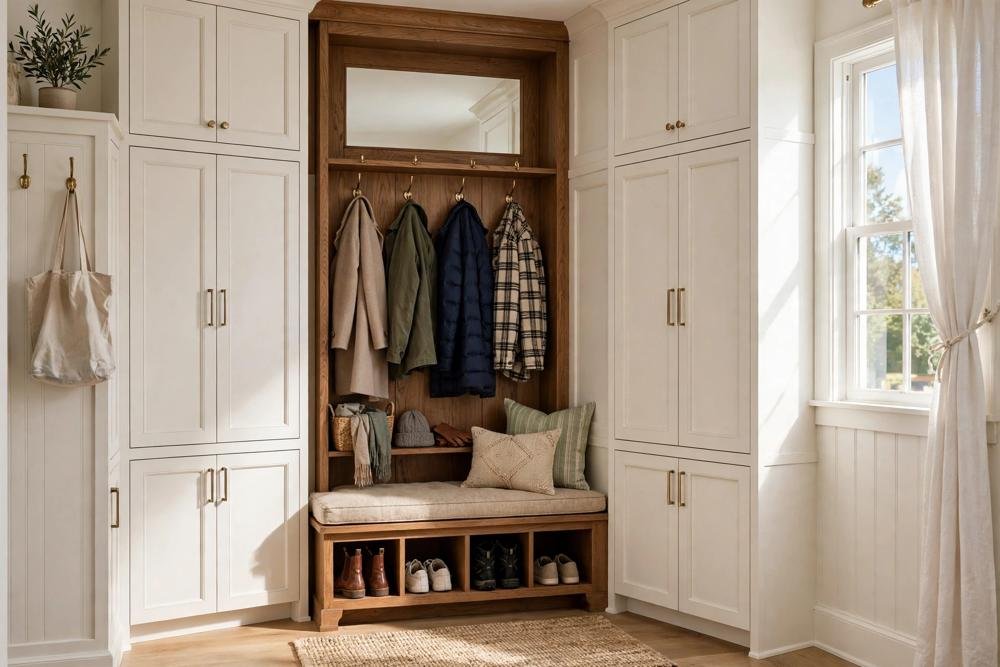
A built-in corner mudroom is a corner hall tree, a corner cabinet, or a fitted bench with closed storage, built or fitted into the corner itself. It gives you the most storage, and the tidiest look, because out of season coats, hats, and gloves can go behind a door, while daily items stay open and easy to reach.
A corner hall tree typically needs approximately 90 to 120 cm of wall and a depth of approximately 40 to 50 cm, while a corner cabinet fits into the corner and uses vertical space rather than wall length. A fitted bench with drawers or cupboards underneath gives you a seat plus closed shoe storage, but it needs the same careful measuring as any bench, plus room to open the drawers without blocking the walkway. Sizes vary by product, so always check the listing, including height, depth, and door swing if the unit has doors.
Anchoring is essential for any tall built-in unit. Tall furniture can tip, especially in a home with children or pets, and a corner unit is often leaned on when people sit down or reach up. Follow the instructions that come with the piece, use the fixings suited to your wall type, and get landlord permission before drilling if you rent. If you cannot anchor a tall unit safely, choose a lower, wider piece instead, or a freestanding bench with a separate, properly fixed hook rail. A beautiful unit that can tip is not a good mudroom.
Closed storage needs a rule, or it will fail in a different way from open storage. Use closed storage for overflow and out of season items, and keep daily coats and shoes open. If you put daily items behind a door, you will stop opening the door in a hurry, and the coats will end up on the bench, on a chair, or on the floor. That is not a failure of discipline. It is a failure of layout. Daily items must be the easiest items to reach, and closed storage must be for the things you need once a week or once a season, not once a day.
A built-in version also costs more and takes longer, and it is harder to take with you when you move. That is fine if you own the home, or if you plan to stay for years, and if the corner is genuinely large enough. It is not the right first step for a small apartment, a short lease, or a corner you have not measured yet. Start smaller, prove the layout, and build up only if the corner still needs more storage after a month of daily use.
Shoes, Boots, and Wet Gear
Shoes are where a mini mudroom succeeds or fails, because shoes are the messiest daily item. The rule is simple: one pair per person in the corner, in winter plus one pair of boots per person in a tray, and everything else elsewhere. If every pair of shoes you own lives by the door, no basket or rack will be large enough, and the corner will always look cluttered.
Use a system that matches your household. For one or two people, one basket under the bench, or a low rack with two or three pairs, is enough. For a family, a shoe rack with a shelf per person, or a basket per person, works better than one large pile, because each person can find their own shoes without digging. Label baskets for children, not because labels look tidy, but because a child who can find their own basket will actually put shoes away.
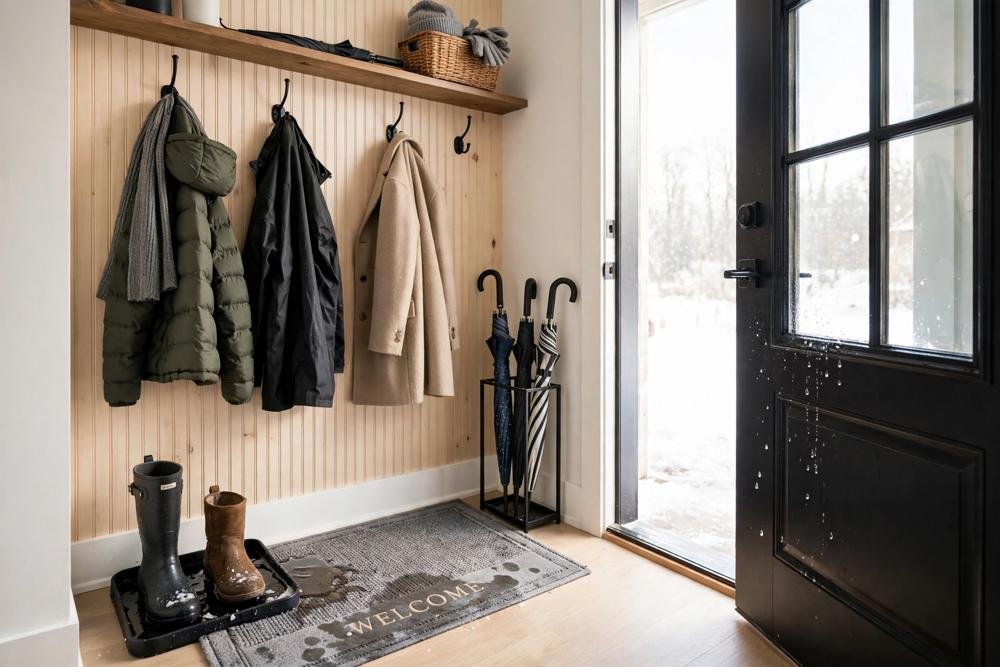
Winter needs its own setup. A boot tray, with a raised edge, catches water and mud from boots, and it should be large enough for the boots that are actually worn that day. A washable runner in front of the bench protects the floor and defines the entry area, but choose one that lies flat and does not curl at the edges, so it does not trip anyone. Add a glove basket, a small umbrella stand, and a drying hook for a wet coat, away from fabric and from any light that gets hot. Wet coats should drip into the tray or onto the mat, not onto a wooden floor or a rug.
Pets and kids add two more jobs. A dog lead, waste bags, and a towel for paws need a hook and a basket near the door, so you are not searching for them when the dog is already excited. School bags and backpacks need a hook each, at a height a child can reach, or they will end up on the floor. If a stroller lives by the door, it needs its own clear space, not a space borrowed from the walkway, and it must not block the exit route. The safety notes from the pillar apply here too: keep cords, leads, and straps away from walkways, anchor tall units, and do not block a fire safety route in a shared building.
Shopping List by Category
A shopping list helps because it stops you buying the same thing twice, and it stops you buying a beautiful piece that does not fit the system. Buy in this order, so you can stop when the corner works, rather than buying everything at once.
Hooks: a hook rail, adhesive hooks, or individual fixed hooks, depending on your version. Count hooks honestly: one per daily coat, one per daily bag, one lower hook for a child if needed, and one spare. Check weight limits on the packaging for adhesive hooks, and check fixings for fixed hooks.
Seating: a freestanding bench, a low storage bench, or a small stool. Check depth, height, and whether it leaves a comfortable walkway. A storage bench gives you a seat plus a place for shoes, but a plain bench plus baskets is often cheaper and easier to clean.
Shoe storage: baskets, a low shoe rack, or a boot tray, or all three in winter. One basket or rack section per person works better than one large pile. Check that shoes fit without sticking out into the walkway.
Wet gear: a boot tray with a raised edge, a washable mat or runner, an umbrella stand, and a glove basket. These are not extras in winter. They are the floor protection that makes the whole system work.
Small items: a key tray, a small bowl, or a shallow shelf for keys, sunglasses, and a dog lead. Keep this small, or it will become a junk tray. One tray, emptied once a week, is enough.
Styling, last: a mirror at head height, a small plant on a high shelf, and a framed print if you want one. These make the corner feel finished, but they should come after the storage works. A mirror also helps in a dark corner, because it bounces light back into the space, as long as it is placed where it catches light from a window or a hallway light, not facing a blank wall.
What to Skip
Skipping the wrong things is as important as buying the right things. Skip a full wardrobe in a corner, because it will dominate the space and block light and air. Skip a row of cubbies for every family member if the corner is only a metre wide, because cubbies need depth and width that a small corner does not have. Skip a tall plant in a very narrow corner, because it will be knocked every day, and skip a console with drawers you never open, because it will become a junk drawer by the door.
Skip anything that needs a large footprint for a small benefit. A full length mirror is useful, but a very large mirror in a tight corner can dominate the space; a smaller mirror at head height gives you the same check before you leave without taking floor space. Skip a second shoe rack if the first one is full, and instead move spare shoes elsewhere. Skip a second basket for gloves if the first one is full, and instead rotate gloves with the seasons. If a basket is full, something needs to leave, not a second basket to arrive.
Skip open shelving for everything, if you live with dust, pets, or a busy household, because open shelves in a mudroom collect dust and clutter quickly. Use open hooks and racks for daily items, and closed baskets or a cabinet for the rest. Skip a dark, heavy unit in a dark corner, because it will make the corner feel smaller and less inviting. Choose a lighter colour, or a unit with open space at the top, so the corner does not feel like a cupboard.
Finally, skip the idea that a mini mudroom must be finished in one weekend. A good mini mudroom is a system you adjust over a few weeks. Buy the hooks, bench, baskets, tray, and mat first, live with them, and then add a shelf, a mirror, or a second basket only if a real gap appears. That is cheaper, and it is more likely to last, than buying a complete set on day one and discovering that half of it does not fit your daily routine.
Keeping It Tidy Week After Week
A mini mudroom does not stay tidy by itself. It stays tidy because it has a small weekly routine, and because out of season items are rotated out. Once a week, empty the key tray, return stray items to their proper rooms, and check the shoe basket. If a pair of shoes has not been worn for a week, move it to the wardrobe. If a coat has not been worn for a week, move it to the wardrobe too. That five minute check is the whole maintenance system.
Seasonal rotation is the second part. In spring, move heavy winter coats, boots, gloves, and scarves out of the corner, and bring in lighter jackets and rain gear. In autumn, reverse the swap. Do not try to hold summer and winter gear in the corner at the same time, because that is when the corner overflows. A storage box elsewhere in the home, labelled by season, makes this swap a ten minute job rather than a full clear out.
Children and pets need their own small routines too. A child who has a hook at their height and a basket with their name on it is more likely to use the system than a child who has to reach an adult hook and dig through a shared pile. A dog lead that always hangs on the same hook, next to a basket with waste bags and a paw towel, means you are not searching for gear when you need to leave quickly. Keep cords, leads, and straps tidy and out of the walkway, and check that tall units remain anchored, especially after a move or a rearrangement.
If the corner starts to overflow, do not buy more storage first. Remove something first. Count the coats, shoes, and bags again, and ask which ones are actually daily items. Most overflowing mini mudrooms are not short of storage. They are holding too many non daily items in a daily space. Move the extras out, and the corner will usually work again without spending anything.
Checklist: Before You Build
- Measure both walls from the corner, and note skirting, trim, switches, and sockets.
- Mark the door swing arc and the clear walkway you must keep, approximately 75 to 90 cm as a comfort guide.
- List daily coats, shoes, bags, keys, and pet or school items, and count them honestly.
- Choose one version: no-drill, light drilling with landlord permission, or built-in with anchoring.
- Check every product size against your measurements, including depth, height, and door swing.
- Check adhesive hook weight limits, or get landlord permission before drilling.
- Plan anchoring for any tall unit, and keep the exit route and door swing clear.
- Buy hooks, seating, shoe storage, a boot tray, and a washable mat first, styling last.
- Put daily items only in the corner, and move out of season gear elsewhere.
- Live with the layout for a few weeks, then adjust one thing, rather than buying more storage.
Conclusion
A mini mudroom in an apartment or a small home does not need a separate room, a renovation, or a large budget. It needs one corner, measured properly, with hooks for coats and bags, a seat for changing shoes, storage for daily shoes, a tray for wet boots, a basket for small items, and a washable mat to protect the floor. That system, in its no-drill, light drilling, or built-in form, can handle coats, boots, bags, keys, and pets without taking over the living room.
Start with the version that fits your lease and your budget, keep daily items only in the corner, and rotate out of season gear when the weather changes. Live with the layout for a few weeks before you add more, and remove something before you buy another basket. Done that way, a mini mudroom will make coming home and leaving home easier every day, not just on the day you build it.
Related reading
- Corner Entryway Ideas for a Tight Corner
- The following guides are the next articles in this Corner Entryway series, listed in publishing order. They are not yet live, so they are listed in plain text here and will be linked once each one publishes: Corner Storage, Winter Entryway Organization, Hallway Corner, Renter-Friendly Corner, Bench and Hall Tree Size Guide, Budget Makeover, Open Entryway, Functional Zones, Entryway Corner Decor, and Pets and Kids Storage.
Frequently Asked Questions
How much space do I need for a mini mudroom?
You need one corner, not a room. Hooks only can work with approximately 60 to 90 cm of wall, and a bench version typically needs approximately 90 to 120 cm of wall, plus room in front of the bench to sit down. Keep approximately 75 to 90 cm of clear walkway as a general comfort guide, and check every product size against your own measurements before you buy.
Can I make a mini mudroom without drilling?
Yes. Use adhesive hooks, a freestanding bench, baskets on the floor, a boot tray, and a washable mat. Check adhesive hook weight limits first, test one hook before loading it, and do not use adhesive hooks to anchor a tall unit. If you rent, get landlord permission before drilling, and consider a no-drill setup first to test the layout.
What is the cheapest mini mudroom setup?
A no-drill setup is usually cheapest, at approximately under $50 to $100 in total for hooks, a freestanding bench or stool, baskets, a tray, and a mat, depending on the products you choose. Buy hooks, seating, shoe storage, a tray, and a mat first, and add styling last. Prices vary, so check listings, and do not buy a full set before you have measured the corner.
How do I stop shoes from taking over a mini mudroom?
Keep one pair per person in the corner, plus boots in a tray in winter, and move all other shoes elsewhere. Use a basket or a rack section per person, rather than one large pile, so each person can find their own shoes. Once a week, move any pair that has not been worn that week back to the wardrobe.
How do I handle wet boots and coats in winter?
Use a boot tray with a raised edge, a washable mat or runner, a glove basket, and an umbrella stand, and hang a wet coat on a drying hook where it can drip onto the tray or mat. Keep wet gear off wooden floors and rugs, choose a mat that lies flat and does not curl, and rotate out of season gear out of the corner when the weather changes.
Is a built-in mudroom worth it in a small apartment?
Only if you own the home or plan to stay for years, if the corner is large enough, and if the tall unit can be anchored safely. For most apartments, a no-drill or light drilling version does the same daily jobs for less money and less permanence. Start smaller, prove the layout over a few weeks, and build up only if the corner still needs more closed storage after that.