Introduction
A rustic bathroom vanity is one of those things that looks like it cost a fortune and took weeks to source — and can genuinely be built from a pile of reclaimed barnwood in a single weekend, or pulled together from a vanity you already own with nothing more than a coat of paint, some new hardware, and an afternoon.
The rustic aesthetic is more forgiving than almost any other style precisely because imperfection is the point. Uneven plank widths, visible nail holes, slight colour variation between boards, a finish that looks worn at the edges — these are not flaws to fix. They are the material doing exactly what it is supposed to do. Which means that whether you are building from scratch or transforming something you already have, the margin for error is smaller than you might think, and the margin for genuine, satisfying results is larger.
This guide covers both routes honestly. Building a vanity from reclaimed wood or a repurposed piece of furniture, and what that actually involves in practice. Transforming an existing vanity to read as rustic without any construction at all, and the specific changes that make the biggest difference. And what to look for if you decide, after reading both sections, that buying a ready-made rustic vanity is simply the better fit for your time and situation right now.
🔗 Building a complete rustic bathroom? Read our southwestern desert bathroom decor guide and our rustic basement design guide for more rustic inspiration.
Part 1: Building a Rustic Vanity From Scratch
Option A: Reclaimed Barnwood Construction
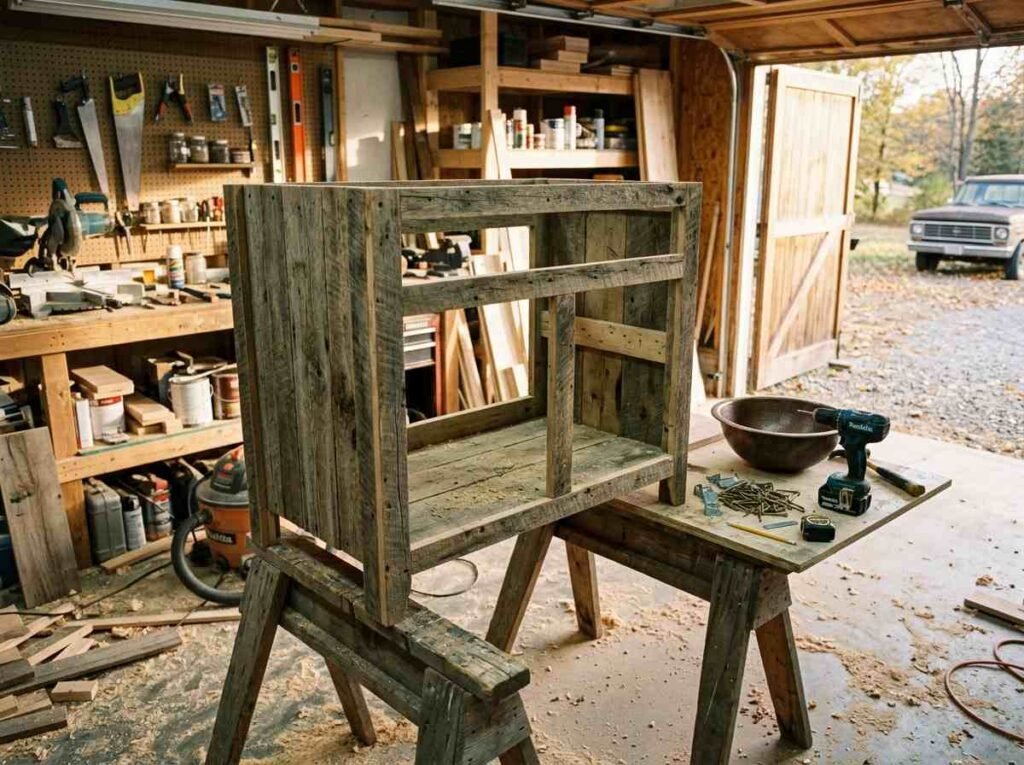
Building a vanity frame from genuine reclaimed barnwood or salvaged lumber produces the most authentic rustic result available, since the material itself already carries real age, weathering, and history before a single cut is made.
Sourcing the wood. Salvage yards, demolition sales, and online marketplaces specialising in reclaimed lumber are the best sources. Look for boards that are structurally sound (free of rot and significant insect damage) even if their surface shows heavy weathering, since the weathering is exactly what you want to keep.
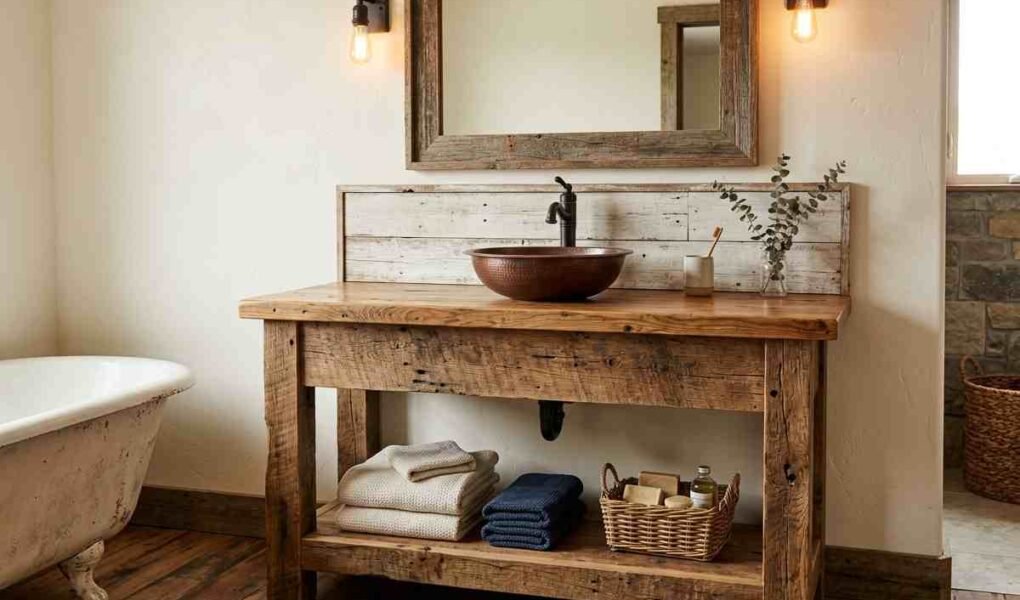
Planning the frame. A simple box frame with a shelf or open base is the most achievable beginner structure, avoiding the more complex joinery of a fully enclosed cabinet with doors. An open-shelf design also suits the rustic aesthetic particularly well, since exposed storage (baskets, folded towels, stacked jars) is a defining feature of the look.
Building the vanity top. The top surface needs to be both structurally solid and properly sealed, since it will face direct, repeated water exposure. Plan for the sink cutout before final assembly if using a drop-in or undermount sink, or skip the cutout entirely and use a vessel sink instead, which only requires a single drilled hole for the drain and supply lines.
Sealing thoroughly. Reclaimed wood has often dried unevenly over its prior life and needs a thorough, multi-coat application of a genuine water-resistant sealant, paying particular attention to the top surface and any cut edges.
Option B: Repurposing an Existing Piece of Furniture
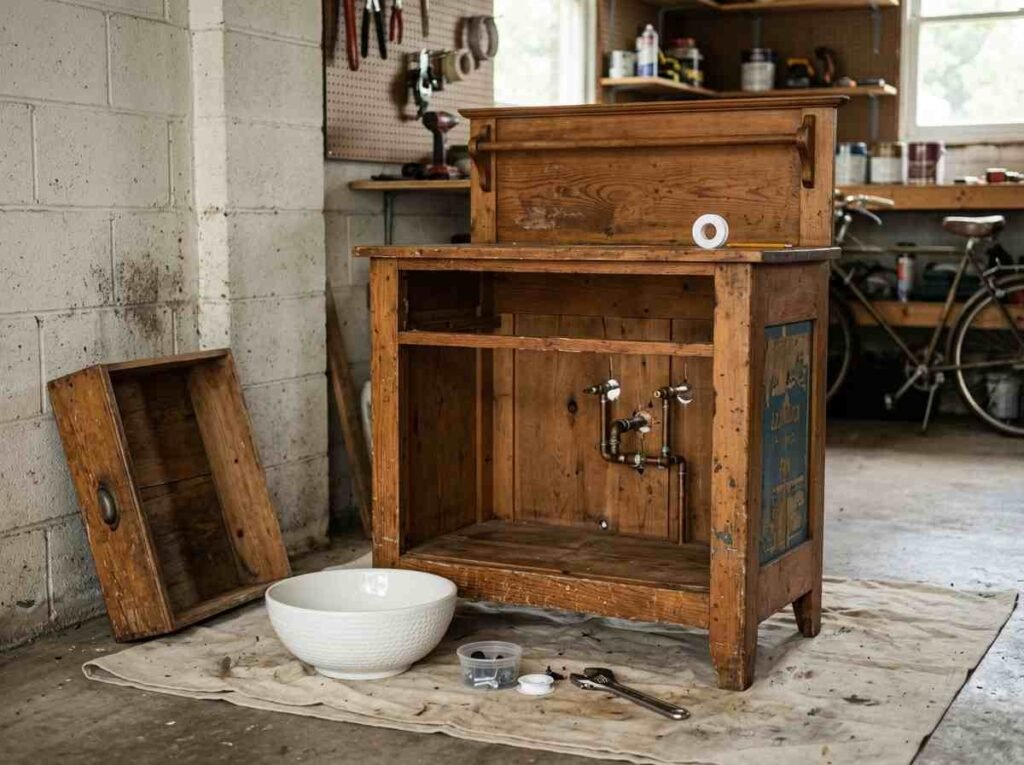
Converting an old dresser, washstand, or console table into a vanity is a slightly more approachable starting point than building entirely from raw lumber, since the basic structure already exists.
What to look for in a piece. Solid wood construction, sound joinery, and a height and depth reasonably close to standard vanity dimensions all make for an easier conversion. A piece with some existing wear, scratches, or an imperfect finish is actually an advantage for a rustic result, since it means less work disguising anything that looks too new.
The sink decision. A vessel sink placed on top of the original surface, with only a small hole drilled for plumbing, is the simplest and most reversible conversion approach, preserving the most original material. A drop-in or undermount sink requires cutting into the piece’s top, delivering a more built-in look at the cost of permanently altering the original furniture.
Plumbing access. The piece will need an opening cut, typically through the back panel or a drawer fixed in a non-functional position, to allow supply lines and drainage through. This is generally straightforward for a plumber experienced with furniture conversions.
You can also read Best Wood for a Bathroom Vanity: The Complete Material and Care Guide
Part 2: Making an Existing Vanity Look Rustic
If building from scratch isn’t realistic right now, transforming a vanity you already own is a faster, lower-skill path to the same overall aesthetic.
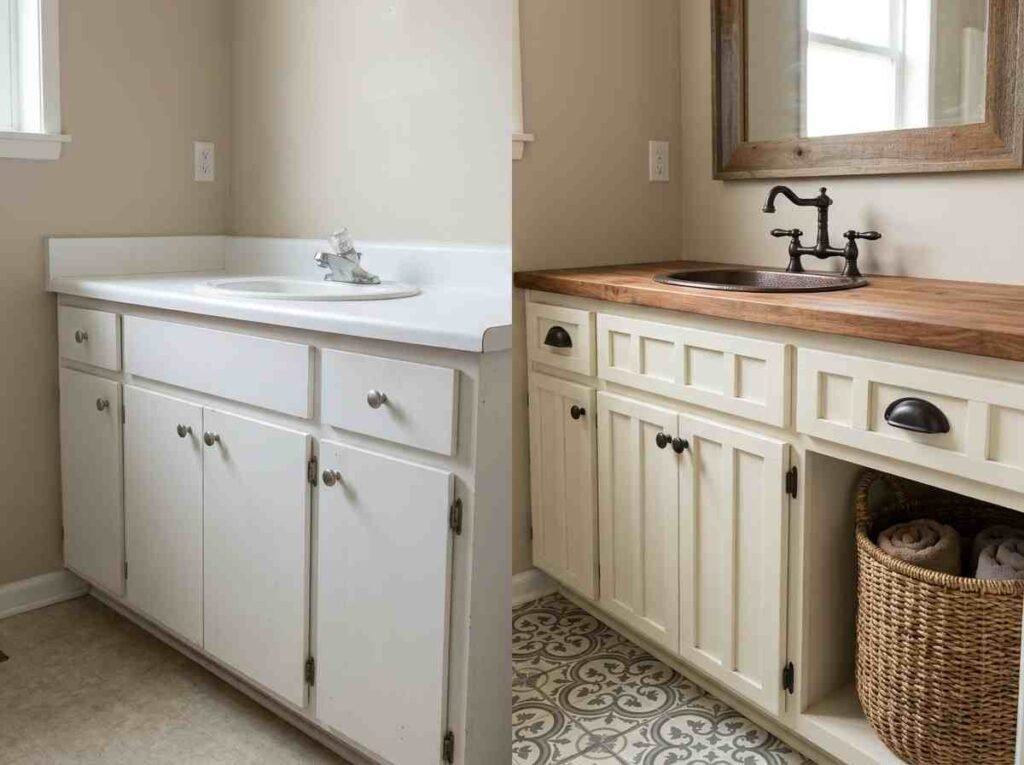
Add wood texture if the existing vanity lacks it. A plain, flat-fronted vanity can be dressed up with applied wood trim, shiplap-style panel inserts, or a simple board-and-batten treatment fixed directly to the existing cabinet doors, instantly introducing the grain and texture rustic style depends on.
Distress the existing finish deliberately. Light, targeted sanding at corners and edges, combined with a darker glaze or wax worked into the resulting marks, mimics decades of genuine wear in an afternoon. This works particularly well on a vanity that’s currently too smooth, too uniform, or too obviously new.
Swap the hardware for something with genuine weight and texture. Cast iron, aged bronze, or hand-forged-style pulls and knobs do an enormous amount of work toward a rustic impression, often more than any other single change to an existing piece.
Replace a modern countertop with a more rustic-reading material. A butcher block top, a live-edge wood slab, or a concrete countertop with a textured finish all read as considerably more rustic than a polished stone or engineered quartz surface, even with the rest of the cabinet unchanged.
Add open shelving or a woven basket beneath. If the existing vanity is fully enclosed, introducing a lower open shelf, or simply placing a large woven basket beneath an open-legged vanity, brings in the exposed storage element that’s so central to the rustic look.
Change the sink and faucet. A hammered copper or stone vessel sink, paired with an oil-rubbed bronze or matte black faucet, can shift the whole impression of an existing vanity considerably without touching the cabinet itself at all.
You can also read Free Standing Bathroom Vanity: The Complete Guide
What Makes a Vanity Read as “Rustic” — The Underlying Principles
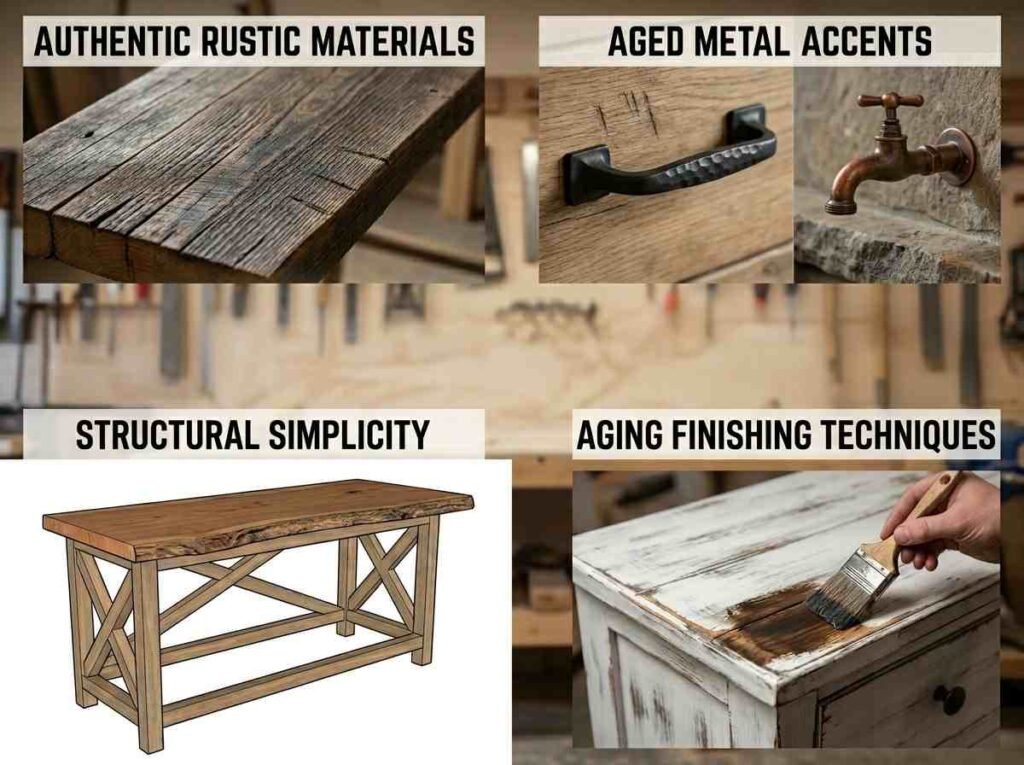
Whether building from scratch or transforming an existing piece, a few consistent principles separate a convincingly rustic result from one that misses the mark.
Visible, honest wood grain. Whether through raw barnwood, a stained natural finish, or applied wood trim, the grain itself needs to be genuinely visible rather than hidden under a glossy, uniform paint finish.
Asymmetry and imperfection over precision. Slightly uneven plank widths, visible nail or screw heads, and small variations in colour from board to board all read as authentic rather than as flaws to correct.
Natural and aged materials throughout, not just on the cabinet. The sink, the faucet finish, the hardware, and even the towels and accessories placed on the vanity all contribute to or undermine the overall impression — a single sleek, ultra-modern faucet can undo an otherwise convincing rustic cabinet.
Function over polish. Open storage, exposed shelving, and visibly functional hardware all support the rustic aesthetic’s underlying honesty about how the piece is actually used, in contrast to more formal styles that conceal function behind smooth, uninterrupted surfaces.
You can also read Bedroom Sets With a Vanity: What to Look For
If You Decide to Buy Instead
After working through what a genuine DIY project actually involves, buying a ready-made rustic vanity is a completely reasonable choice, particularly for a bathroom where time or tool access is limited.
Look for solid wood construction, ideally with visible joinery rather than glued panel construction, since this is the detail that separates a genuinely rustic-built piece from one simply finished to look that way.
Check the finish for genuine texture and variation rather than a uniform, machine-applied “distressed” pattern repeated identically across every unit, which can read as obviously manufactured up close despite looking convincing in a product photo.
Prioritise hardware and sink choice as much as the cabinet itself, since a beautiful rustic cabinet paired with a sleek modern faucet undermines the whole look just as effectively in a purchased vanity as in a DIY one.
Frequently Asked Questions
Q: Can I really build my own rustic bathroom vanity, or should I buy one?
A: Building one yourself is genuinely achievable, particularly using a simple open-frame design or by converting an existing piece of furniture rather than building a fully enclosed cabinet from raw lumber. It requires real time and at least basic comfort with tools, sealing, and ideally some plumbing coordination. Buying a ready-made vanity is a completely reasonable alternative for anyone without the time or tools, as long as the same principles — solid wood, genuine texture, appropriate hardware — are applied when choosing one.
Q: How do I make an existing bathroom vanity look more rustic without replacing it?
A: Add wood texture through applied trim or board-and-batten panels if the existing cabinet lacks it, swap the hardware for something with genuine weight like cast iron or aged bronze, replace a polished countertop with butcher block or a textured concrete surface, and introduce open shelving or a woven basket if the vanity is currently fully enclosed. These layered changes can transform an existing vanity over a single weekend without touching the underlying cabinet structure.
Q: What wood is best for a DIY rustic bathroom vanity?
A: Reclaimed barnwood or other salvaged lumber produces the most authentic result, since the wood already carries genuine age and weathering before any work begins. When sourcing reclaimed wood, prioritise pieces that are structurally sound, free of rot and significant insect damage, even if heavily weathered on the surface, since that surface character is exactly what you want to preserve in the finished piece.
Q: Can I convert an old piece of furniture into a rustic bathroom vanity?
A: Yes, and it’s one of the more approachable DIY routes since the basic structure already exists. Look for solid wood construction, sound joinery, and dimensions reasonably close to a standard vanity. A vessel sink placed on top, with only a small hole drilled for plumbing, is the simplest conversion approach and preserves the most original material, while a drop-in or undermount sink offers a more built-in look at the cost of cutting into the piece itself.
Q: Do I need to seal a DIY rustic vanity differently than a regular wood vanity?
A: Reclaimed wood in particular often needs more thorough sealing than fresh-cut lumber, since it has typically dried unevenly over its prior life and can behave somewhat unpredictably as a result. Apply a genuine water-resistant sealant in multiple thin coats, paying particular attention to the top surface and any cut edges, and plan to reapply every one to two years on a vanity in regular daily use.