
Introduction
The wall above a bed is often the largest empty wall in a bedroom, and it is also the wall people notice first when they walk into the room. When the art is the right size and height, the whole room looks finished and calm. When it is too small, hung too high, or placed slightly off centre, even a well decorated bedroom can feel unfinished.
Hanging wall decor above a bed is not mainly about having a perfect eye for design. It is about a few simple measurements, a clear centre point, and safe hanging. Once you know how wide the art should be in relation to the bed, how high it should sit above the headboard, and what weight your wall can hold, most of the guesswork disappears.
This guide covers those decisions step by step. You will learn how to size art for twin, full, queen and king beds, how to hang it with and without a headboard, how to keep heavy pieces safe, and how renters can get the same finished look without nails. If your whole room needs a plan too, read Small Bedroom Ideas: The Complete Guide to Layout, Storage, Light and Style.
Key takeaways
• Get the size right first, so the decor fits the bed and the wall.
• Hang it at the right height, with or without a headboard.
• Choose safe, secure hanging for the weight, and check fixings before you hang anything heavy.
• Use a no-nail version that still looks finished if you rent or want no holes.
Idea 1: Get the Size Right First
Size is the most common reason wall decor above a bed looks wrong. A tiny frame floating above a wide bed can look lost, while a piece wider than the bed can feel heavy and crowded. A useful starting point is to aim for art that spans about two thirds of the width of the bed. That proportion gives the bed and the art a clear visual connection without letting one overwhelm the other.
For a twin bed, about 38 inches wide, that means art around 25 inches wide in total. For a full bed, about 54 inches wide, aim for around 36 inches. For a queen bed, about 60 inches wide, aim for around 40 inches. For a king bed, about 76 inches wide, aim for around 50 inches. These are starting points, not strict rules. A slightly wider or narrower piece can still work if the height, spacing and style are right, but staying close to two thirds will solve most sizing problems before you hang anything. If you are working with a tight floor plan, our small bedroom layout ideas for a 10 by 10 room show how to plan the furniture around these sizes.
You do not have to use one large piece to reach that width. A pair of matching frames, a trio of smaller prints, or a grid of four or six frames can work just as well, as long as you measure the whole arrangement as one unit. Leave a small, even gap between frames, usually two to three inches, so the group reads as one composition rather than several separate pictures. If you are hanging more than one frame, tape paper templates to the wall first and step back to check the overall width before you make any holes.
Shape matters too. A wide landscape piece suits a wide bed and a wide wall. A tall portrait piece can work above a narrow bed, but above a queen or king bed it often needs a pair or a wider companion piece to balance the bed. If your wall is very wide, do not try to fill every inch. A well sized central arrangement with breathing space on each side looks better than art stretched across the whole wall just to fill it.

Idea 2: Hang It at the Right Height, With or Without a Headboard
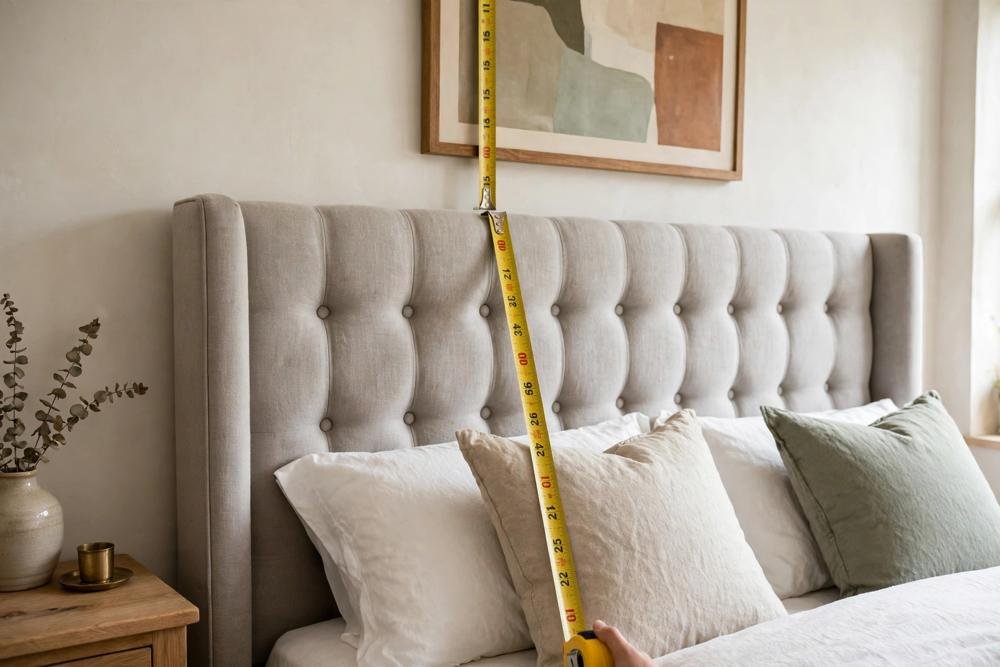
Height is the second decision that changes everything. Art hung too high looks disconnected from the bed, as if it belongs to the ceiling rather than the room. Art hung too low can crowd the pillows or feel unsafe. When you have a headboard, the most reliable guide is to hang the bottom of the frame about six to ten inches above the top of the headboard. That gap is large enough to keep pillows and bedding clear, and small enough that the bed, headboard and art still feel like one arrangement.
If you have a tall headboard, measure from the top of the headboard, not from the mattress or the floor. A tall upholstered headboard already fills a lot of vertical space, so the art above it should sit just above it and not drift up toward the ceiling. If you have a low headboard, the same six to ten inch gap still works well. In both cases, step back after you mark the position and check that the art does not feel like it is floating away from the bed.
Without a headboard, the rules change slightly. Without that visual anchor, art needs to do more work to define the sleeping area. A good starting point is to hang the centre of the art at about eye level when standing, which for most people is around 57 to 60 inches from the floor to the centre of the piece. Then check it from the bed as well. When you are sitting up in bed, the art should feel comfortable to look at, not so high that you have to crane your neck and not so low that pillows cover the bottom edge. If you want the bed itself to feel more finished, browse headboard alternatives for a bedroom without a headboard.
For rooms with very high ceilings, do not hang art high just because there is wall space above it. The art should relate to the bed, not to the ceiling height.
Idea 3: Choose Safe and Secure Hanging for the Weight
Safety matters more above a bed than on most other walls, because this is where you sleep. A frame that falls in a hallway is annoying. A frame that falls above a bed at night is a real risk. That does not mean you cannot hang art above a bed. It means you should match the hanging method to the weight, check what your wall is made of, and be honest about what should not go directly above pillows.
Start by weighing the piece, including the frame and glass if it has glass. Lightweight prints, canvas and small frames can often be hung with a single picture hook rated for that weight. Medium weight framed art usually needs two hooks, spaced apart, so the weight is shared and the piece stays level. Heavy framed art, mirrors, and anything with thick glass needs a stronger fix. In drywall, that usually means finding a stud or using wall anchors rated for the weight. In plaster or brick, you may need a different fixing, so check the correct type before you drill.
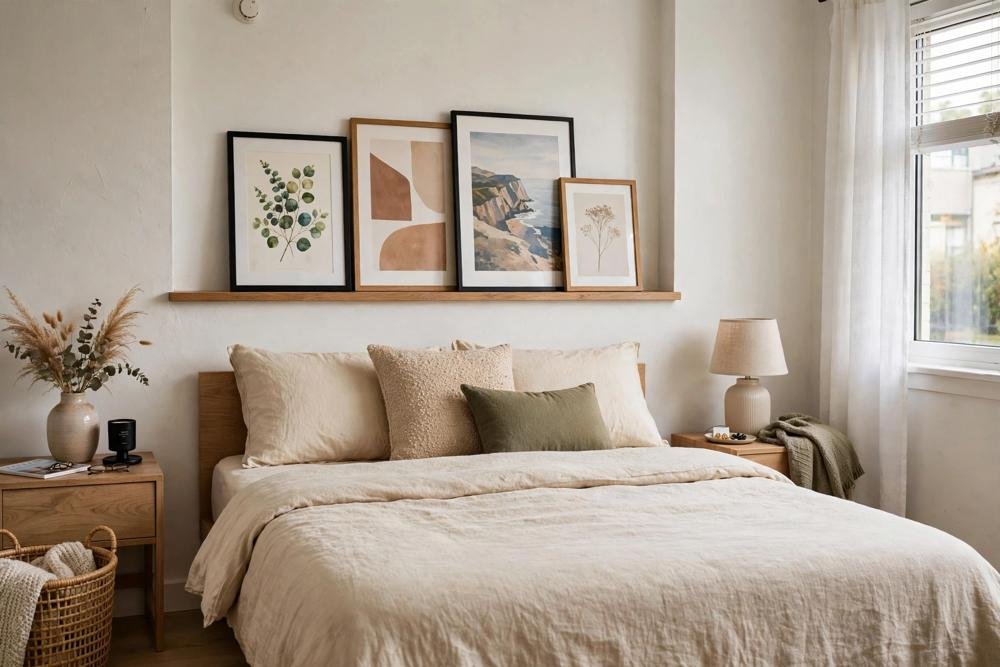
As a practical safety rule, avoid hanging very heavy objects directly above pillows. If a piece is heavy, consider hanging it slightly higher and further back, choosing a lighter alternative such as canvas, acrylic, or a print without glass, or using a picture ledge with a lip that holds the frame in place. A picture ledge can be a good option because the frame rests on the ledge rather than hanging only from a wire, but the ledge itself must be fixed securely and rated for the weight you plan to place on it.
Check the hanging wire, cord or brackets on the back of the frame before you hang it. Old wire can fray, and a single small nail can bend under a heavier frame. Replace worn wire, use two fixing points where possible, and use a spirit level to check that the piece sits straight. After hanging, give the frame a gentle tug to check that it feels solid. If it moves, wobbles, or feels loose, take it down and fix the mounting before you sleep under it.

Idea 4: Use a No Nail Version That Still Looks Finished
Renters, and anyone who does not want holes in the wall, can still get a finished look above a bed. The key is to choose a method that matches the weight and the wall surface, and to test it before you commit to a large piece. Adhesive strips and hooks work well for lightweight frames, but they have weight limits and they do not suit every surface. Textured paint, damp walls, and some wallpapers can reduce adhesion, so always read the weight rating and test a small strip in a hidden spot first if you are unsure. For a full room plan built around these methods, see our guide on how to decorate a rental bedroom without drilling holes.
Leaning art is one of the simplest no nail options. A large frame leaned against the wall on a dresser, a shelf, or a low bench behind the bed can look intentional, especially if it is wide enough to relate to the bed. Make sure the base is stable, that it cannot easily be knocked over, and that it does not sit where pillows will push against it. A picture ledge is another strong option. It lets you layer two or three frames and swap art easily, although the ledge itself still needs secure fixing, so check whether your rental agreement allows that single fixing or whether a freestanding shelf is a better choice.
Fabric panels, tapestries, and lightweight textile art can also work above a bed without nails if they are hung from a tension rod, a hook system rated for the weight, or a freestanding frame. These options suit a softer, more relaxed bedroom style, and they are much lighter than framed glass. Whatever method you choose, keep the same sizing and height rules from the earlier sections. A no nail piece that is too small or too high will look just as unfinished as a nailed piece that is too small or too high.
Plan removal as carefully as hanging. Remove adhesive strips slowly, following the product instructions, and photograph the wall before and after. For a bigger wall change with the same no-damage promise, see these peel and stick wallpaper bedroom ideas for renters.
Centring and a Simple Hanging Checklist
Centre the art over the bed, not over the whole wall, especially if a door, window, or wardrobe pushes the bed to one side. Measure two thirds of the bed width, mark the centre of the bed and the centre of the art with painter’s tape, and line those marks up. If you have a headboard, mark six to ten inches above it. If not, mark eye level and check it from a sitting position. Use a spirit level, hang with a fixing rated for the weight, then step back to the doorway and check the whole arrangement.
What to Avoid
Avoid hanging art so high that it looks disconnected from the bed. This is the most common mistake, especially in rooms with high ceilings. Avoid using a single small frame above a queen or king bed, unless it is part of a larger arrangement. A small frame on its own will usually look lost, no matter how beautiful the image is.
Avoid hanging very heavy framed glass directly above pillows without a secure stud fixing or a safer alternative. Avoid mixing too many frame styles, sizes and colours in one arrangement above a bed, and avoid drilling into a wall without checking for pipes, wires, or the correct fixing for your wall type. Avoid adhesive products for frames heavier than their rated weight, and avoid placing art where a door, a curtain, or a wardrobe door will hit it when opened.
FAQs
How high should I hang art above a bed?
With a headboard, hang the bottom of the frame about six to ten inches above the top of the headboard. Without a headboard, hang the centre of the art at about eye level, around 57 to 60 inches from the floor, and check it from a sitting position in bed as well.
How big should wall decor be above a queen bed?
Aim for art that spans about two thirds of the bed width. For a queen bed, about 60 inches wide, that is around 40 inches in total. That total can be one wide piece, a pair of frames, or a trio measured as one arrangement.
Is it safe to hang heavy art above a bed?
Light and medium weight art can be safe if it is hung with fixings rated for its weight and checked for stability. Very heavy framed glass directly above pillows carries more risk. In that case, use a stud fixing, choose a lighter canvas or acrylic alternative, or use a secure picture ledge.
Can I hang wall decor above a bed without nails?
Yes, for lightweight pieces. Adhesive strips rated for the weight, leaning art on a stable surface, a picture ledge, or lightweight textile art can all work. Always check the weight rating and test adhesion on your wall surface first, especially in a rental.
What should I do if I have no headboard?
Without a headboard, let the art define the sleeping area. Hang it at eye level, choose a width close to two thirds of the bed, and consider a pair of frames or a wider piece so the arrangement does not look narrow. A shelf, a painted wall panel, or a leaning frame can also help anchor the bed visually. For more renter safe ways to treat the whole wall, see our renter friendly bedroom accent wall ideas.
Should wall decor above a bed match the bedding?
It should coordinate, not match exactly. Pick one colour from the art and repeat it in a throw, cushion, or bedding accent, while keeping the rest of the palette calm. If you are also choosing a wall colour, these sage green bedroom ideas and paint colours that work in real light are a calm place to start. If bedding is patterned, keep art simpler. If bedding is plain, art can carry more colour.
Conclusion
Hanging wall decor above a bed comes down to three simple habits: size it to the bed, hang it close enough to feel connected, and fix it safely for its weight. Use the two thirds width guide as a starting point, keep the gap above a headboard to six to ten inches, and centre the art over the bed rather than over the whole wall. Renters can follow the same rules with adhesive, leaning, or ledge options, as long as the weight rating and wall surface are checked first.
Take time to measure, mark, and step back before you finish. Once size, height and safety are right, the wall above your bed becomes the calm focal point the room needs. To finish the room, layer in soft light with these cozy bedroom lighting ideas without an overhead light.