Introduction
A pantry that is organised with labels and containers is easier to cook from, easier to shop for, and wastes less food, because you can see what you have at a glance. You stop buying a second bag of rice you already own, you spot what is running low before dinner, and anyone in the household can find the pasta without asking.
This guide is different from the no pantry storage article in this cluster, which is about creating pantry space when you have none. This guide is about organising a pantry you already have, with containers and labels that actually stay tidy after the first week. Most pantry guides stop at buying matching jars. This one starts before you buy anything, because the wrong size container is the most common reason a tidy pantry falls apart.
Before you buy anything: declutter, measure, and plan zones
Start by taking everything out, shelf by shelf. Check dates as you go, and be honest about food that will never be cooked: stale crackers, three half used bags of the same flour, sauces bought for one recipe two years ago. Throw out anything expired or spoiled, and move anything you will not use to a donation box if it is sealed and in date.
Wipe the shelves before anything goes back. It is much harder to clean around full containers later, and a clean shelf makes it easier to see what you actually have.
Then measure. Measure shelf height, shelf depth, and the width of each section, and write the numbers on your phone. A tall cereal container is useless under a low shelf, and a shallow container wastes a deep shelf. Most pantry frustration comes from containers bought on looks alone. Measure first, then buy only containers that fit the shelf they are meant for, with room to lift them out.
Finally, plan zones before you label anything. A zone is a group of foods used together: breakfast, baking, pasta night, snacks, drinks, and cooking basics such as oils and sauces. Zones matter more than alphabetical order, because cooking happens by meal, not by letter. Put daily zones at eye level, heavy zones low, and rarely used zones high.
Idea 1: Choose clear, uniform containers
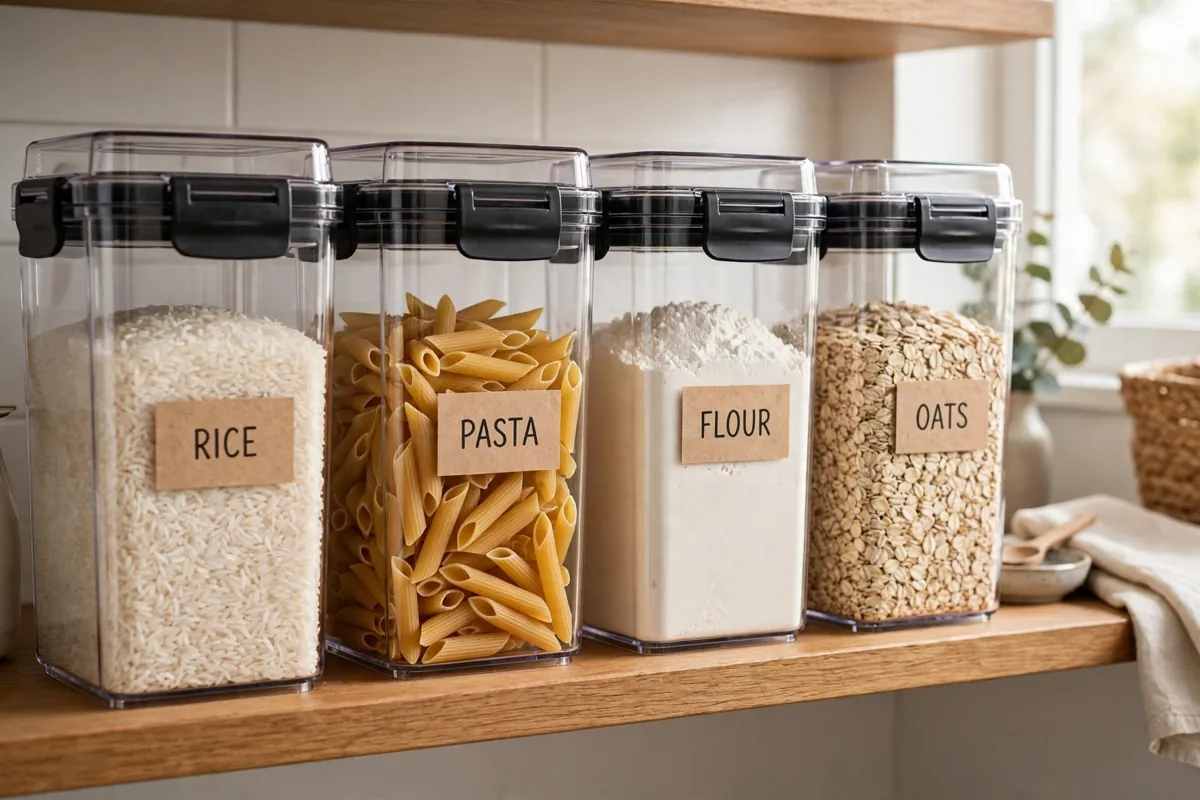
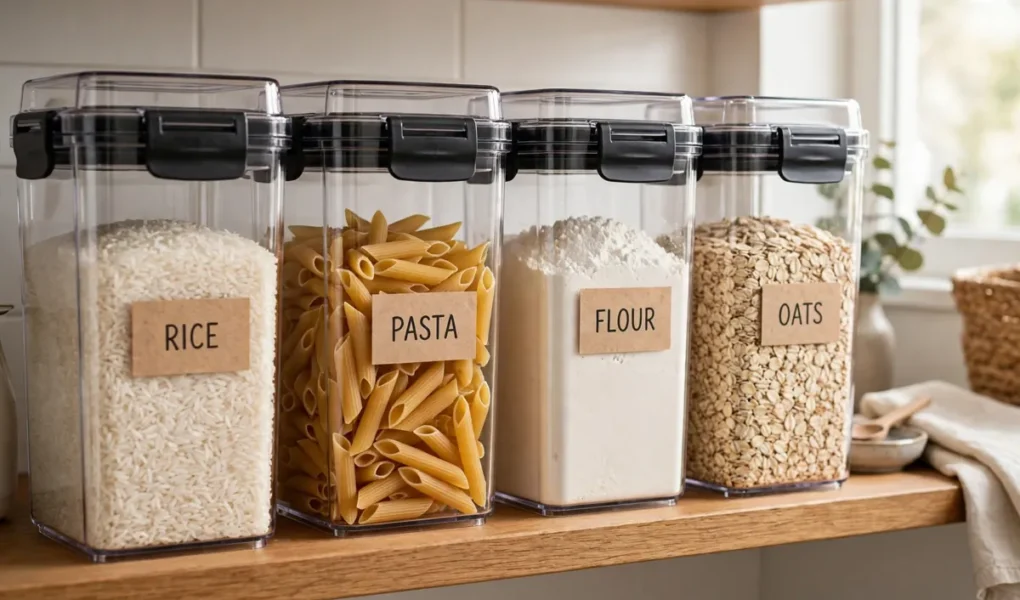
Clear, uniform containers are the foundation of pantry organisation, because they stack neatly, show what is inside, and use less space than bulky packets. Choose square containers, which stack better than round ones, and airtight lids, which keep food fresh longer and keep out moisture and pests.
Decant only foods you use often: flour, sugar, rice, pasta, oats, beans, cereal, and snacks. Keep rarely used foods in their original packets, so you do not waste containers and labels on items you will not finish. Decanting everything looks tidy on day one and becomes a chore by week three.
Choose one container size for most dry goods, and a smaller size for spices and baking items, so shelves look uniform and containers fit together without gaps. A tall, narrow container suits spaghetti and breadsticks. A wide, short container suits flour and sugar, because you can scoop easily. Match the shape to the food and to the shelf height you measured, not just to the set on sale.
Glass suits flour, sugar, and coffee, because it does not stain or hold smells. Good quality plastic suits rice, pasta, and snacks, because it is lighter on high shelves and safer for children to handle. Either works, as long as the lid seals well and the container is easy to open with one hand while cooking.
Buy in phases, not all at once. Start with one zone, for example breakfast, and live with those containers for a week. You will learn which sizes you actually reach for, and you will avoid buying a full set in the wrong size. Add the next zone only when the first one works.
Idea 2: Label by zone and date

Label every container with the food name and the date you opened or decanted it. This helps you use older food first, avoid duplicates when shopping, and know when food is past its best. A label that says only rice is only half useful. A label that says rice, opened October, tells you what it is and how urgent it is.
Label by zone, not just by food: breakfast, baking, pasta night, snacks, and drinks, so everyone in the household puts items back in the same zone. Put a small zone label on the shelf edge as well as on the container, so the system survives even when a container is empty and in the dishwasher.
Use a label maker, chalk labels, or simple masking tape, whichever you will actually update when you refill. A beautiful label system you never update is worse than a plain one you do update, because an out of date label misleads you. Keep a marker near the pantry for quick relabelling, and write the use by date from the original packet on the new label before you throw the packet away.
Put labels on the front and top of containers, so you can read them from the shelf and from above. This matters most on high shelves, where you see the top first, and in deep cupboards, where you pull containers out by their lids.
For foods that look alike, labels are essential, not decorative. Plain flour and self raising flour, caster sugar and icing sugar, and different types of rice all look identical in a clear jar. Label those the day you decant them, and add a short note if needed, such as for bread or for cakes, so a helper does not grab the wrong one.
Idea 3: Use bins and turntables for deep shelves
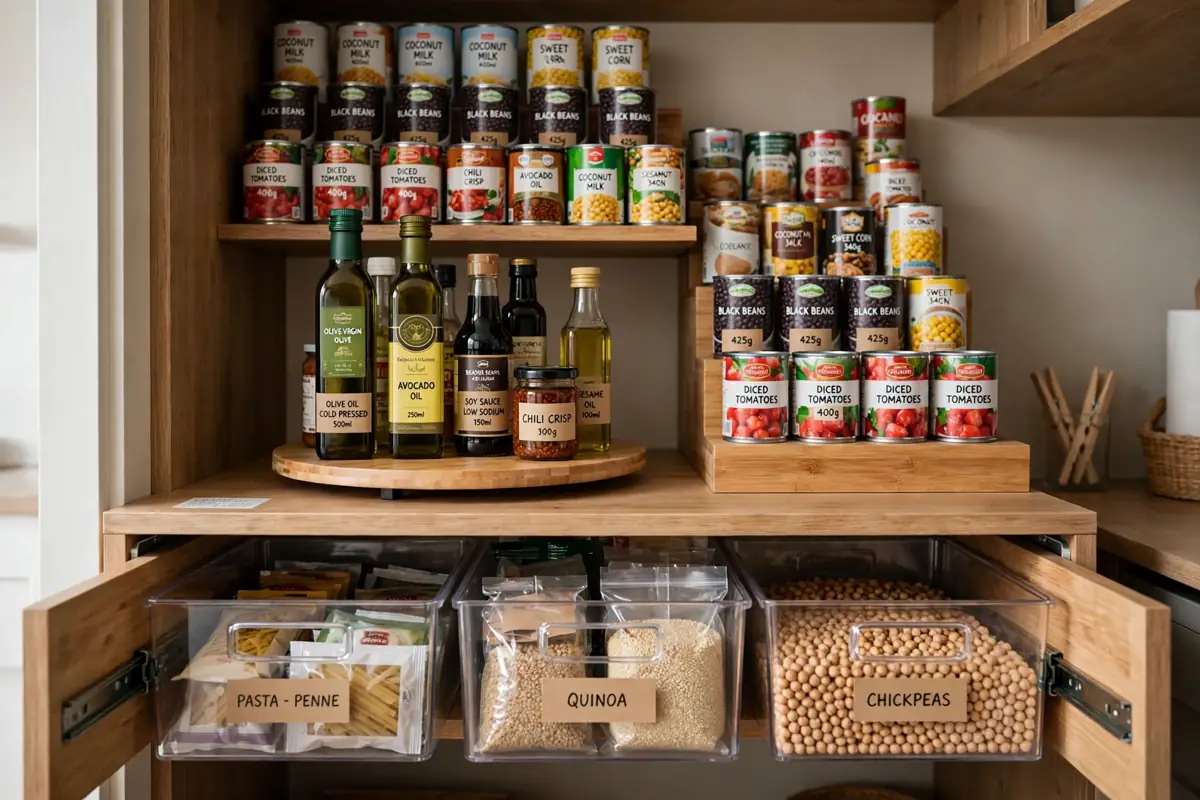
Deep pantry shelves hide food in the back, which leads to expired food and duplicate buying. Use clear bins, grouped by zone, so you can pull out a whole bin instead of digging, and use turntables for oils, sauces, and condiments, so nothing hides in a corner.
For high shelves, use long bins that can be pulled out and set on a counter, almost like a removable drawer. For low shelves, use stackable bins for cans and packets, so heavy items are low and easy to reach. For cans, a stepped riser works better than stacking cans on top of each other, because you can see every label at a glance.
Leave a gap on each shelf. A pantry packed to the edges has nowhere to go but back to chaos, and it makes it hard to put new shopping away. Aim for one empty bin, or about a hand width of free space per shelf, as breathing room for the weekly shop.
In a small pantry or a single cupboard, the same system scales down. Use one bin per zone, a small turntable for sauces, and a riser for cans. You do not need a walk in pantry for this to work. You need one bin that pulls out cleanly and one place for everything to return to.
Keep food and cleaning products separate. Cleaning sprays, detergents, and chemicals do not belong on food shelves, even in labelled containers. Keep them under the sink or in a utility cupboard, away from food, and out of reach of children.
Idea 4: Keep a simple maintenance system
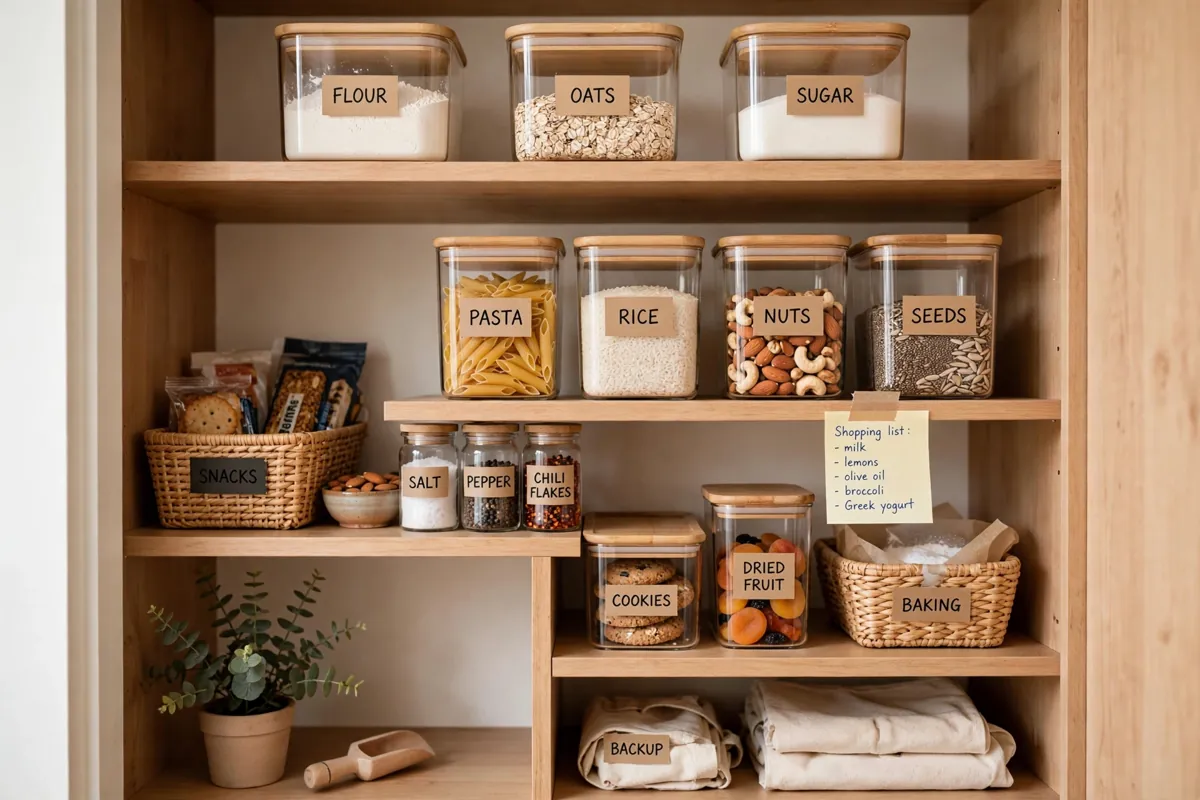
A pantry stays tidy only if maintenance is simple. Do a five minute weekly check: throw out expired items, put back items that drifted to the wrong zone, and note what is running low on a shopping list kept in or near the pantry.
Use a first in, first out rule. When you restock, put new items behind older ones, so older food gets used first. This one habit prevents most pantry waste, especially for cans, sauces, and baking ingredients that sit quietly for months.
Use a one in, one out rule: a new container or gadget means an old one leaves, so the pantry does not slowly fill up again. The same rule works for packets. A new snack box in means an empty or stale box out.
When you shop, check the pantry first, or keep a running list on your phone, so you do not buy duplicates of items you already have hidden in the back. Photograph the pantry shelves before a big shop if it helps. That photo is faster than a written inventory, and it shows you exactly what is low.
Do a deeper clean every three months. Take one zone out at a time, check every date, wipe the shelf, update any faded labels, and move anything you have not used in three months to the front, so it gets used or leaves. A quarterly reset takes less than half an hour when the weekly check has been happening, and it stops the slow drift back to clutter.
How to organise a small pantry on a budget
You do not need to buy a full matching set to get the benefit. Start with decluttering, which costs nothing, then add labels to what you already own. Masking tape and a marker will organise a pantry today, and you can upgrade to a label maker later if you want the uniform look.
Reuse jars, baskets, and boxes you already have for the first pass. A shoe box lined with paper works as a zone bin. A jam jar works as a spice container. Spend money only where it solves a real problem: airtight containers for flour and cereal that go stale, a turntable for a deep corner, or a riser for cans you cannot see.
If money is tight, buy containers one zone at a time, starting with the zone that causes the most daily frustration. For most households that is breakfast or snacks, because those are reached for every day by more than one person. A tidy breakfast zone alone can change how the whole kitchen feels in the morning.
What to avoid
- Buying all containers at once before decluttering, which leads to wrong sizes and wasted money
- Decanting every food, including rarely used items, which wastes time and containers
- Opaque containers for foods you need to see, like rice and pasta, which hide what is running low
- No labels, so no one knows what is inside or when it was opened
- Packing shelves to the edge, with no room for new shopping
- Storing cleaning products with food, which is unsafe and adds clutter to food zones
- Labelling only the food name, with no date, so older food hides behind newer food
Frequently asked questions
What containers are best for pantry organisation?
Clear, square, airtight containers in one or two sizes. Square stacks better than round, clear shows what is inside, and airtight keeps food fresh longer. Match the height to your shelf, and use a tall narrow container for spaghetti and a wide container for flour.
Should I label pantry containers?
Yes, with food name and date opened. Labels help you use older food first, avoid duplicates, and keep zones tidy for everyone in the household. Add the use by date from the original packet when you decant.
How do I organise a deep pantry?
Use clear bins by zone and turntables for oils and sauces, so you can pull out a whole bin instead of digging, and nothing hides in the back. A stepped riser helps for cans, and a pull out bin works like a drawer on high shelves.
Should I decant all pantry foods?
No, decant only foods you use often, like flour, sugar, rice, and pasta. Keep rarely used foods in original packets to save containers and time, and to keep their use by dates visible.
How often should I clean out my pantry?
Do a five minute weekly check for expired items and drift, and a deeper clean every three months, when you can check dates, wipe shelves, and update labels. That rhythm keeps a pantry tidy without a big weekend project.
How do I stop buying duplicates?
Keep a shopping list in or near the pantry, check the pantry before shopping, and label containers clearly, so you know what you already have. A quick photo of the shelves before a big shop also helps.
Conclusion
Pantry organisation is simple when it is visual: clear uniform containers, labels with name and date, bins and turntables for deep shelves, and a five minute weekly check. Measure before you buy, buy in phases by zone, and keep one gap on each shelf for new shopping.
Start with decluttering, then one shelf, then one zone at a time, and buy containers only for foods you use often. That tidy, labelled pantry will save you time, money, and food waste, and it links naturally to the final part of your kitchen cluster: renter friendly decor that works without drilling or damage.